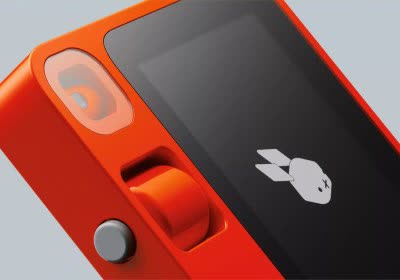
|
Posted
on November 16, 2001 by Per
Hansson
Check for CPU
and Motherboard
prices here.
This
article will in detail explain how to overclock the new AMD
Athlon XP CPU with the organic packaging (XP, supposedly
from eXtreme Performance).
Most
of you probably already know how the multiplier works on the
AMD Athlon CPU’s, but I’ll try to explain it just
briefly here for the ones of you that don’t. AMD produce
their CPU’s in batches of several hundred, since the
process of making a processor is very advanced they don’t
know from scratch which CPU will be able to run at this and
that speed in MHz.
So
when the processors have been manufactured they are sent to
the test lab where they are being tested for which speed the
reliably can run at, when that has been determined the name
and speed of the processor is printed in the center piece
which is called the CPU core or die, and next they use a
laser to cut off all L1 bridges which where used to
determine which speed the chip could run at. (When the L1
bridges are connected you can change the speed of the chip
“on the fly”.) But now when they have been cut off the
computer doesn’t have the ability to change the multiplier
through the L1 bridges anymore, so it’s now set on the
processor itself, the L3 and L4 bridges determine what speed
the CPU will run at from now… (The multiplier is what
determines the speed which the CPU will run at, it’s a
number between 5x and 12,5x which is then multiplied by your
memory FSB which is always default to 133mhz on the XP line
of CPU’s, so my 1,33ghz chip has a multiplier of 10
x 133 = 1,33ghz)
As
you have probably already guessed reconnecting the L1
bridges will allow you to change the multiplier given to the
CPU just like AMD does when testing the chips…
But
of course, you either must have a mainboard which allow
changing the multiplier either inside the BIOS or by jumpers
on the mainboard itself…
Shown
below from left to right you have the new Athlon XP and the
old Thunderbird CPU, if you have a sharp eye you will notice
that the L series of bridges are different between the two
(yellow dots).

On
the old T-Bird all you had to do was use a regular HB pencil
and draw a connection between the four L1 bridges and the
lead in the pencil was enough to let current flow through
and thus the CPU was identified as “unlocked” by the
BIOS, you were able to change the multiplier as you wanted
then.
With
the XP things have changed though, it’s made of an organic
material, a sort of PCB board actually, as opposed to the
old T-Bird which uses chisel.
The
method used by AMD to cut off the bridges hasn’t changed,
they still use a laser beam, but now the laser cuts a
“valley or pit” down into the CPU. What this means is
that the old pencil trick will not work anymore because the
resistance is increased due to the pit, (the lead connection
becomes longer due to it…)
But
there is more to it, if you take a multimeter and measure
the resistance from one of the L1 bridges to ground you will
notice that it’s lower on the XP CPU, this also
contributes to the “lead trick” not to work, i.e. longer
distance and less current means that there will not be
enough power when you start up the CPU so that it’s
identified as “unlocked” by your computers BIOS…
So
what we need to do is use some sort of conductive ink which
has less resistance than lead, there are different types
available, on the old T-Bird the Circuit Works conductive
pen with micro tip worked very good, but on the XP CPU the
L1 bridges themselves are also smaller and thus the tip of
the pencil becomes to large for you to be able to draw a
good line between the five of them without making contact
between them and thus shorting the CPU out…
What
I did was use a needle to apply the ink with, so if you have
such a pencil as I do just squirt some out on a needle and
try to apply it on the bridges, if you don’t have one
though there are better alternatives available. (Non-pencil
types such as the conductive
ink lacquer for example.)
That’s
it, you have now unlocked your CPU, hmm but wait when I
start my computer I am able to select multipliers 11x
through 12,5x only, hmm a closer look on the “valleys”
between the L1 contacts revealed that they are so deep that
they come in contact with the wires underneath, and thus we
are now shorting the CPU out by filling them with conductive
ink…
I
must make a statement here and that is that my XP 1,33ghz
(1500+) CPU has worked flawlessly at 1,6ghz (1900+) the last
week without using the additional method below, I just
can’t select multipliers lower than 11, and that’s it,
but hey we don’t want to do that anyway do we eh? ;-)
Ok,
so you want to “professionally” unlock your XP CPU so
that all multipliers become available, from 5x all the way
up to 12,5x in .5 increments? Well read on then…
|