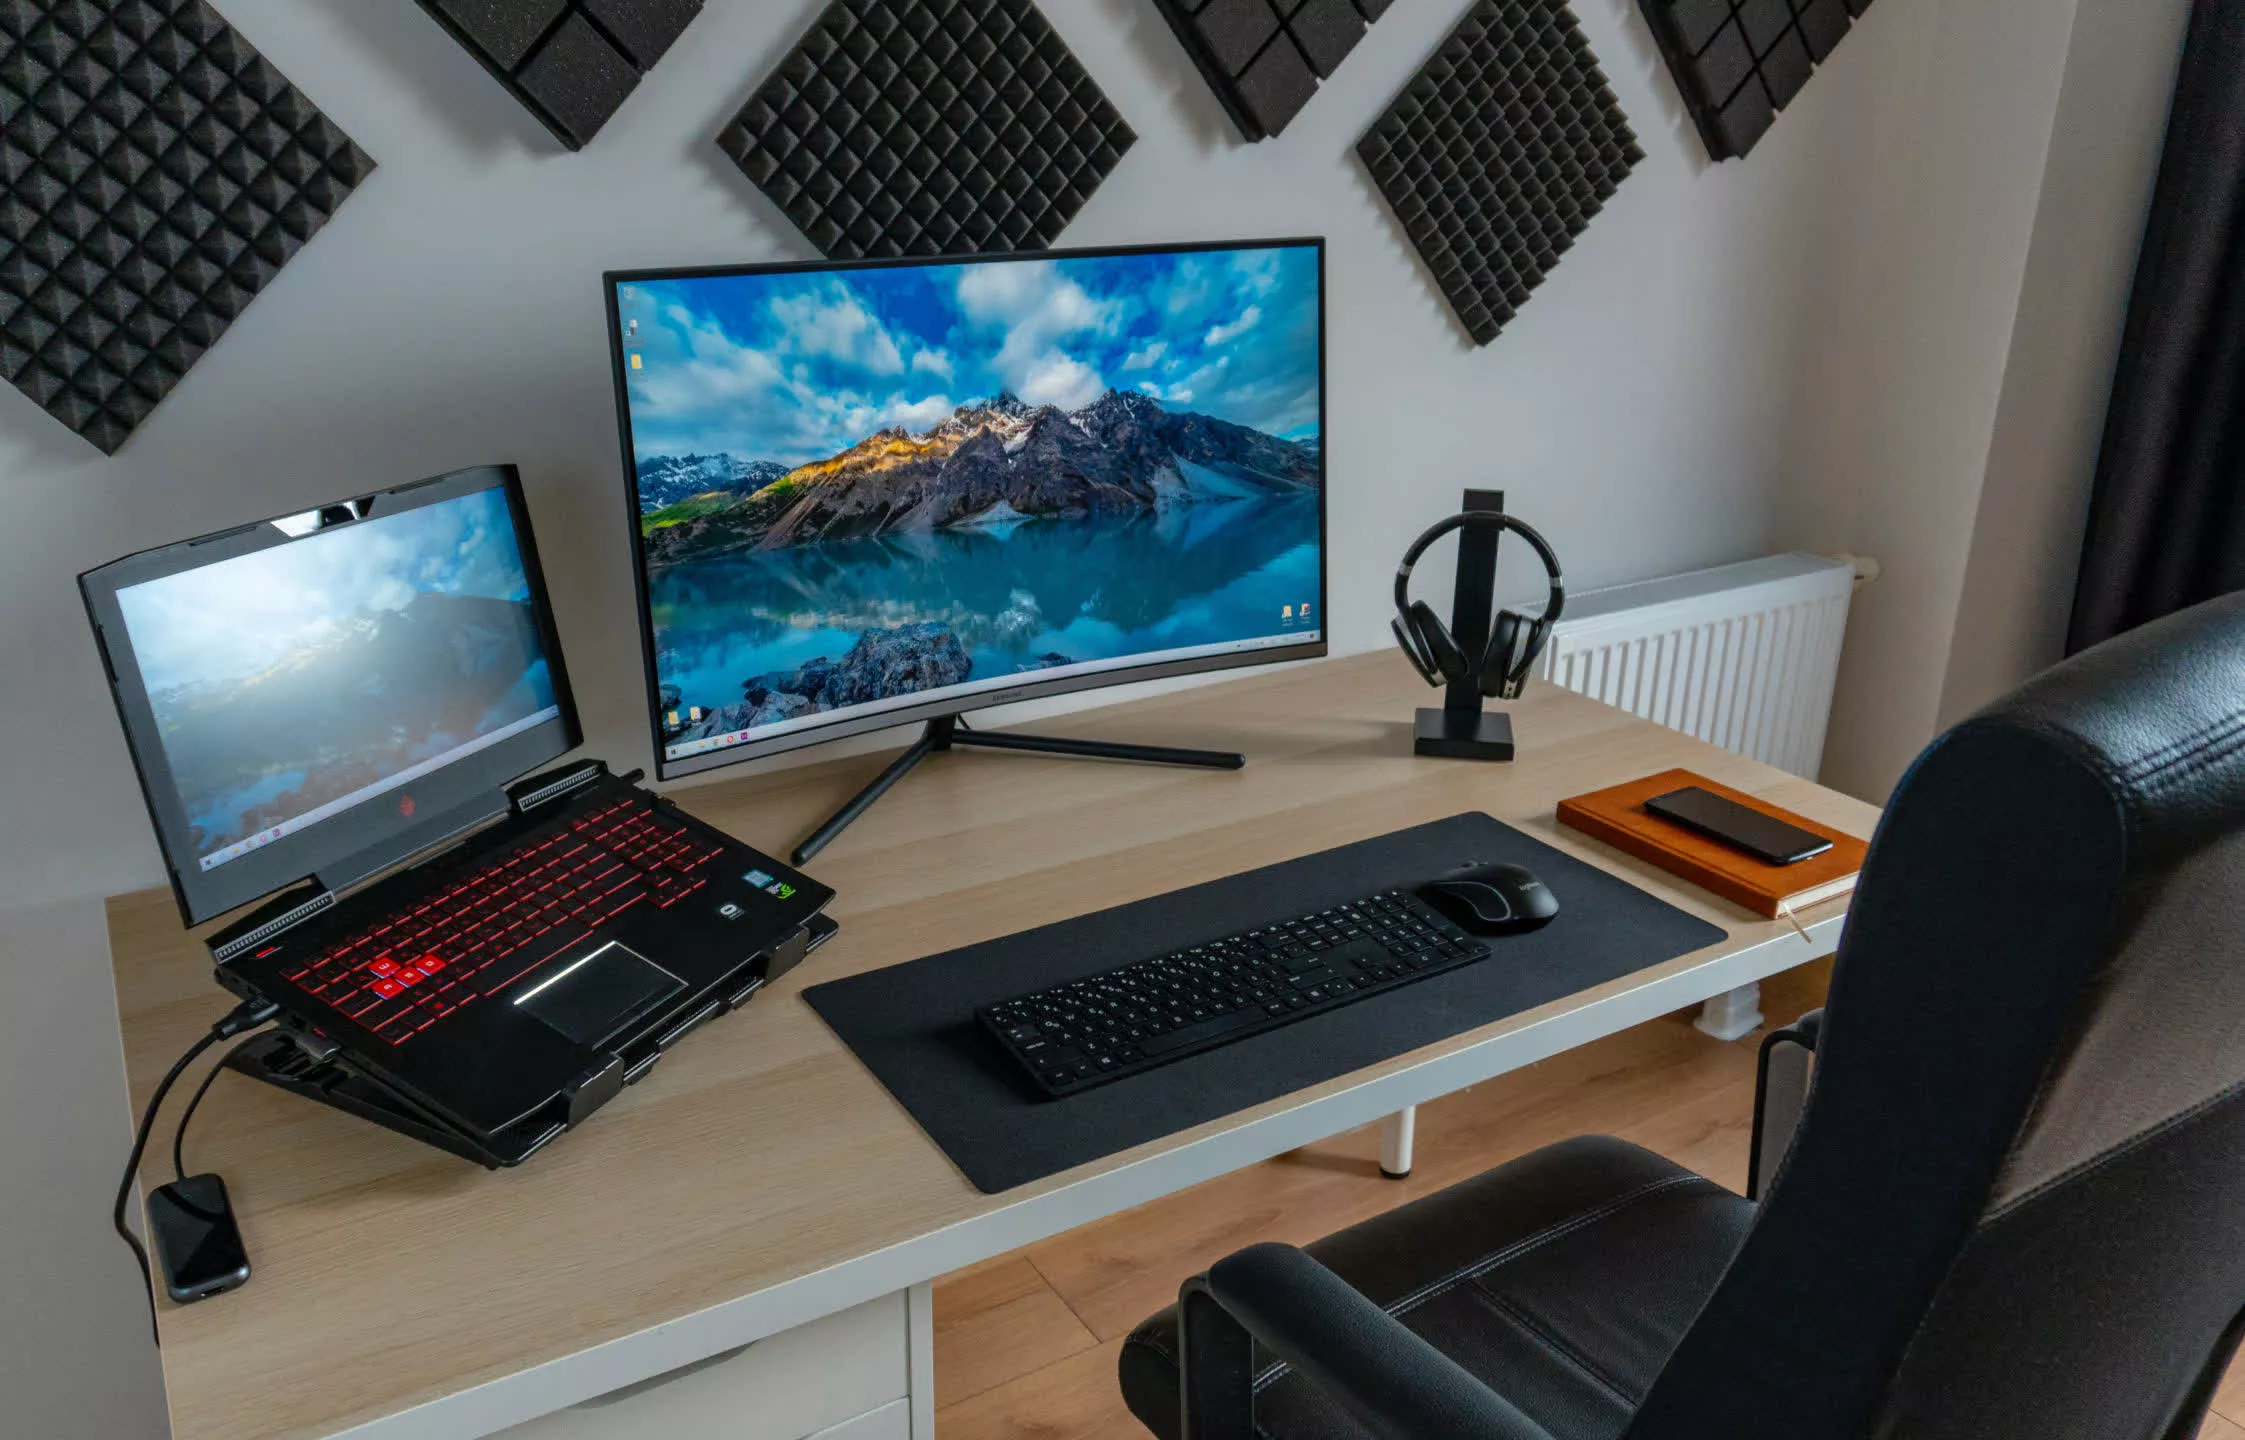
When it comes to improving your productivity, there are many aspects of your PC setup that can have a positive impact. A more powerful processor will crunch through tasks faster, and extra memory will help when there are lots of programs running at the same time.
But ask those who spend long hours working with PCs and most will say that having two or more monitors gives the greatest boost to day to day productivity.
No more swapping between windows, while trying to keep track of what you're doing; faster and easier drag and drop from folder to folder; lots of additional desktop space to view more things at once. Here's our quick and easy guide for setting up a multi-monitor display in Windows.
Hooking up extra monitors to your PC
Naturally, the first thing you'll need to do is plug all of the extra monitors you're going to use into your PC. If it's a desktop machine, then you'll have one of two ways of doing this, depending on your hardware.
Desktop PC / Discrete GPU
If you're using a discrete graphics card, then you should have ports at your disposal similar to the image below. One of these ports will be in use for your main monitor, so which other one should you use? The graphics card we're using has three DisplayPort sockets (DP), one HDMI (bottom left) and one DVI (top right).
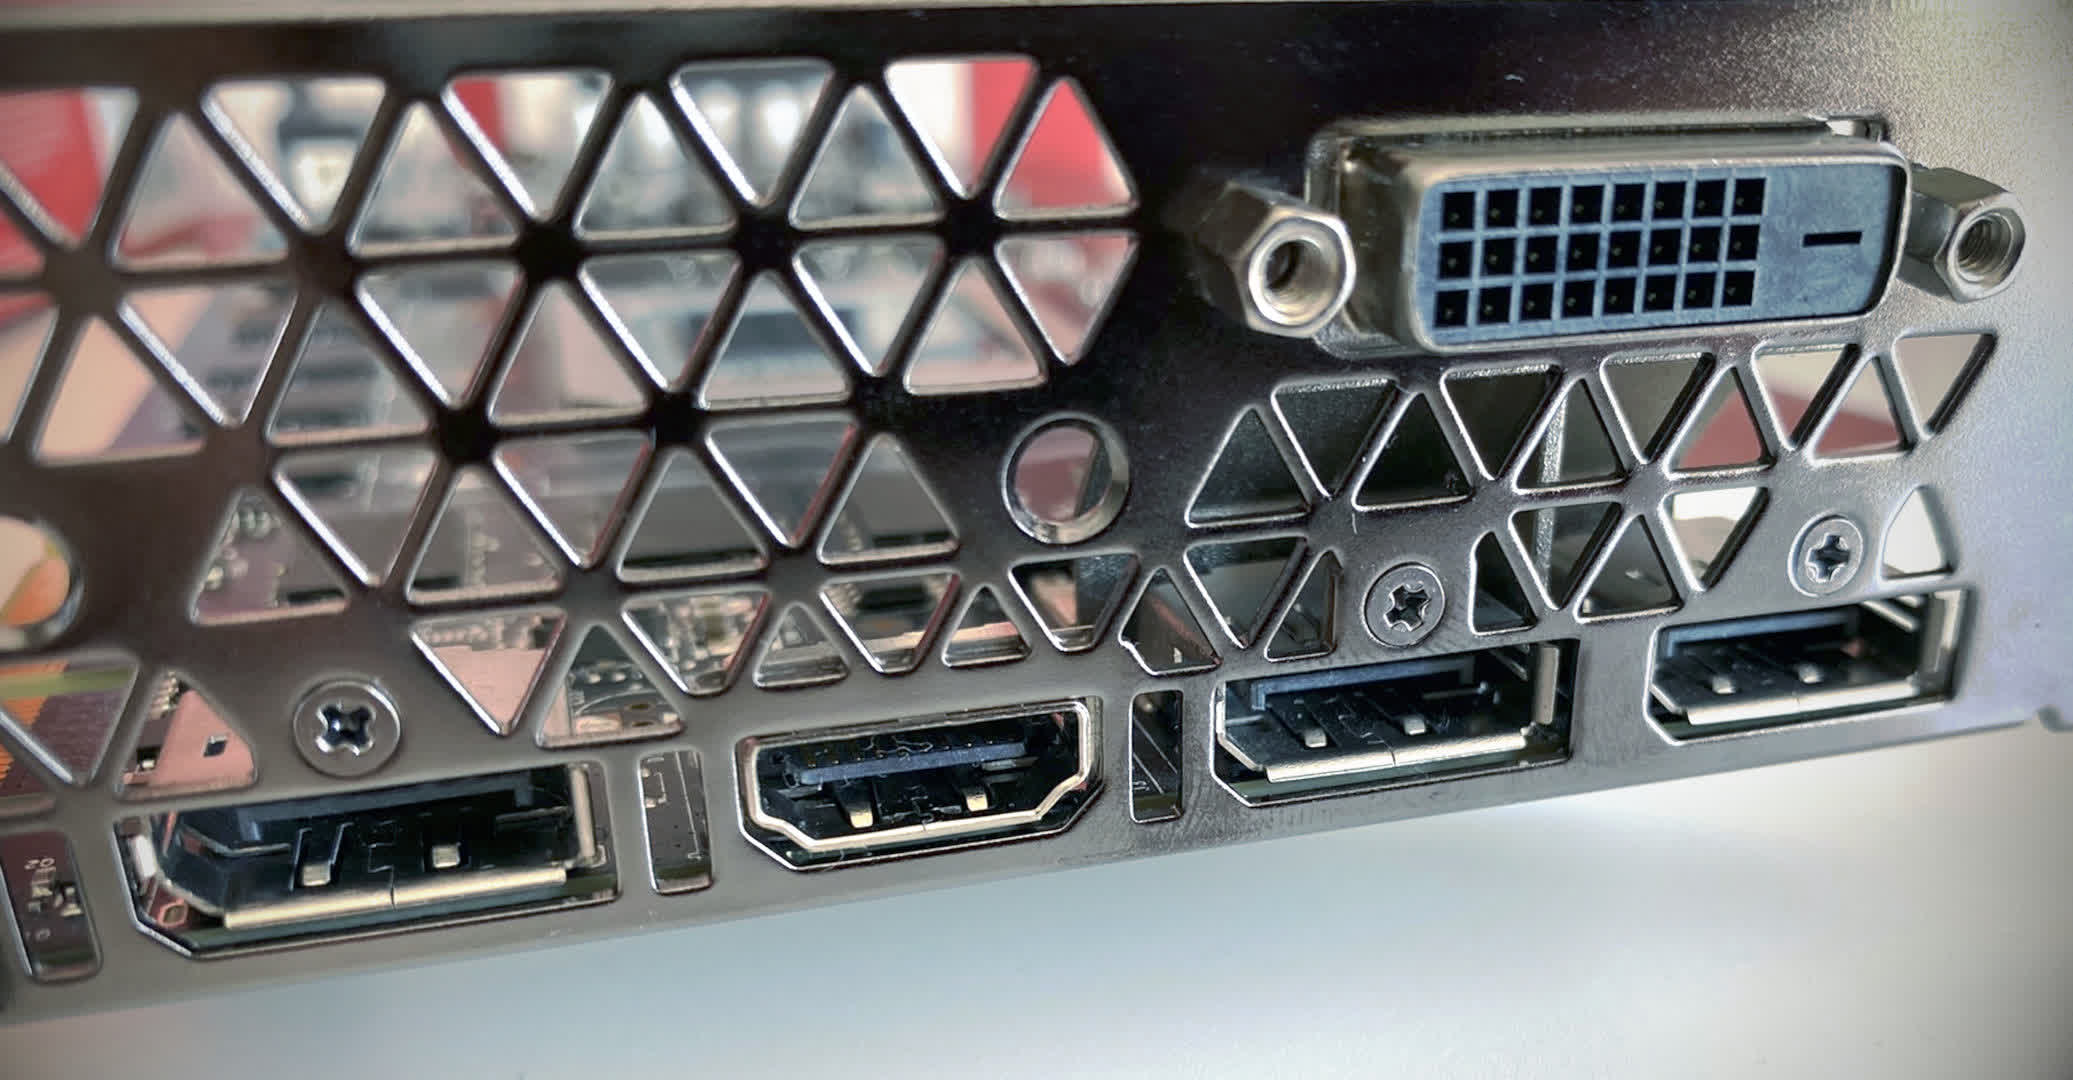
You can mix and match monitor connections, so if the main one is DisplayPort and the new one is HDMI, then it's fine to hook them up. But if you're wanting to use two new monitors, and they're both HDMI, then you'll need to connect at least one of them to DP, and use a DisplayPort to HDMI adapter.
Laptops or Integrated Graphics
If you're using a desktop PC without a discrete graphics card or a laptop, then the decision becomes more important, as your options are going to be limited. Most motherboards will only offer one or two display output sockets (DP and/or HDMI), and laptops typically just have one.
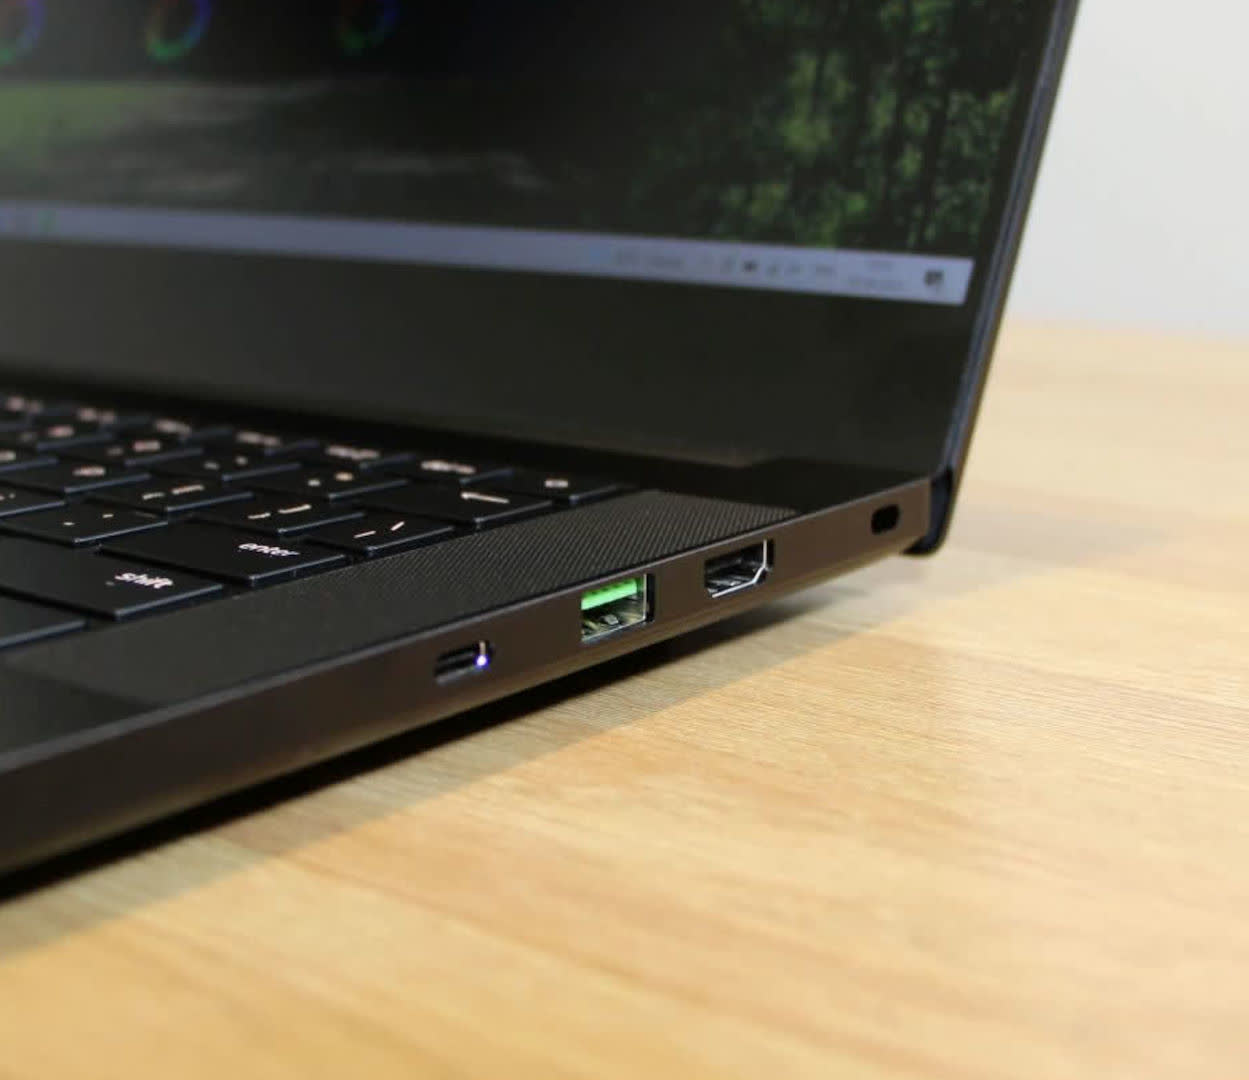
You might think that a single HDMI output on a laptop will restrict what you can do, but it's possible to add two monitors to a single output using a HDMI splitter – however, both screens will display the same content.
Some laptops do support HDMI Alt Mode Type-C, so by using a USB Type-C to HDMI cable, you can attach two monitors and they'll be able to display different things.
Setting up your monitors in Windows
Once you've got everything all connected and powered up, it's time to delve into Windows settings and configure how your extra monitors will display everything.
Press the Windows key + I, or enter the Start Menu and click on Settings. Once here, click on the Display section in the main menu. In Windows 11, you should see the following screen.
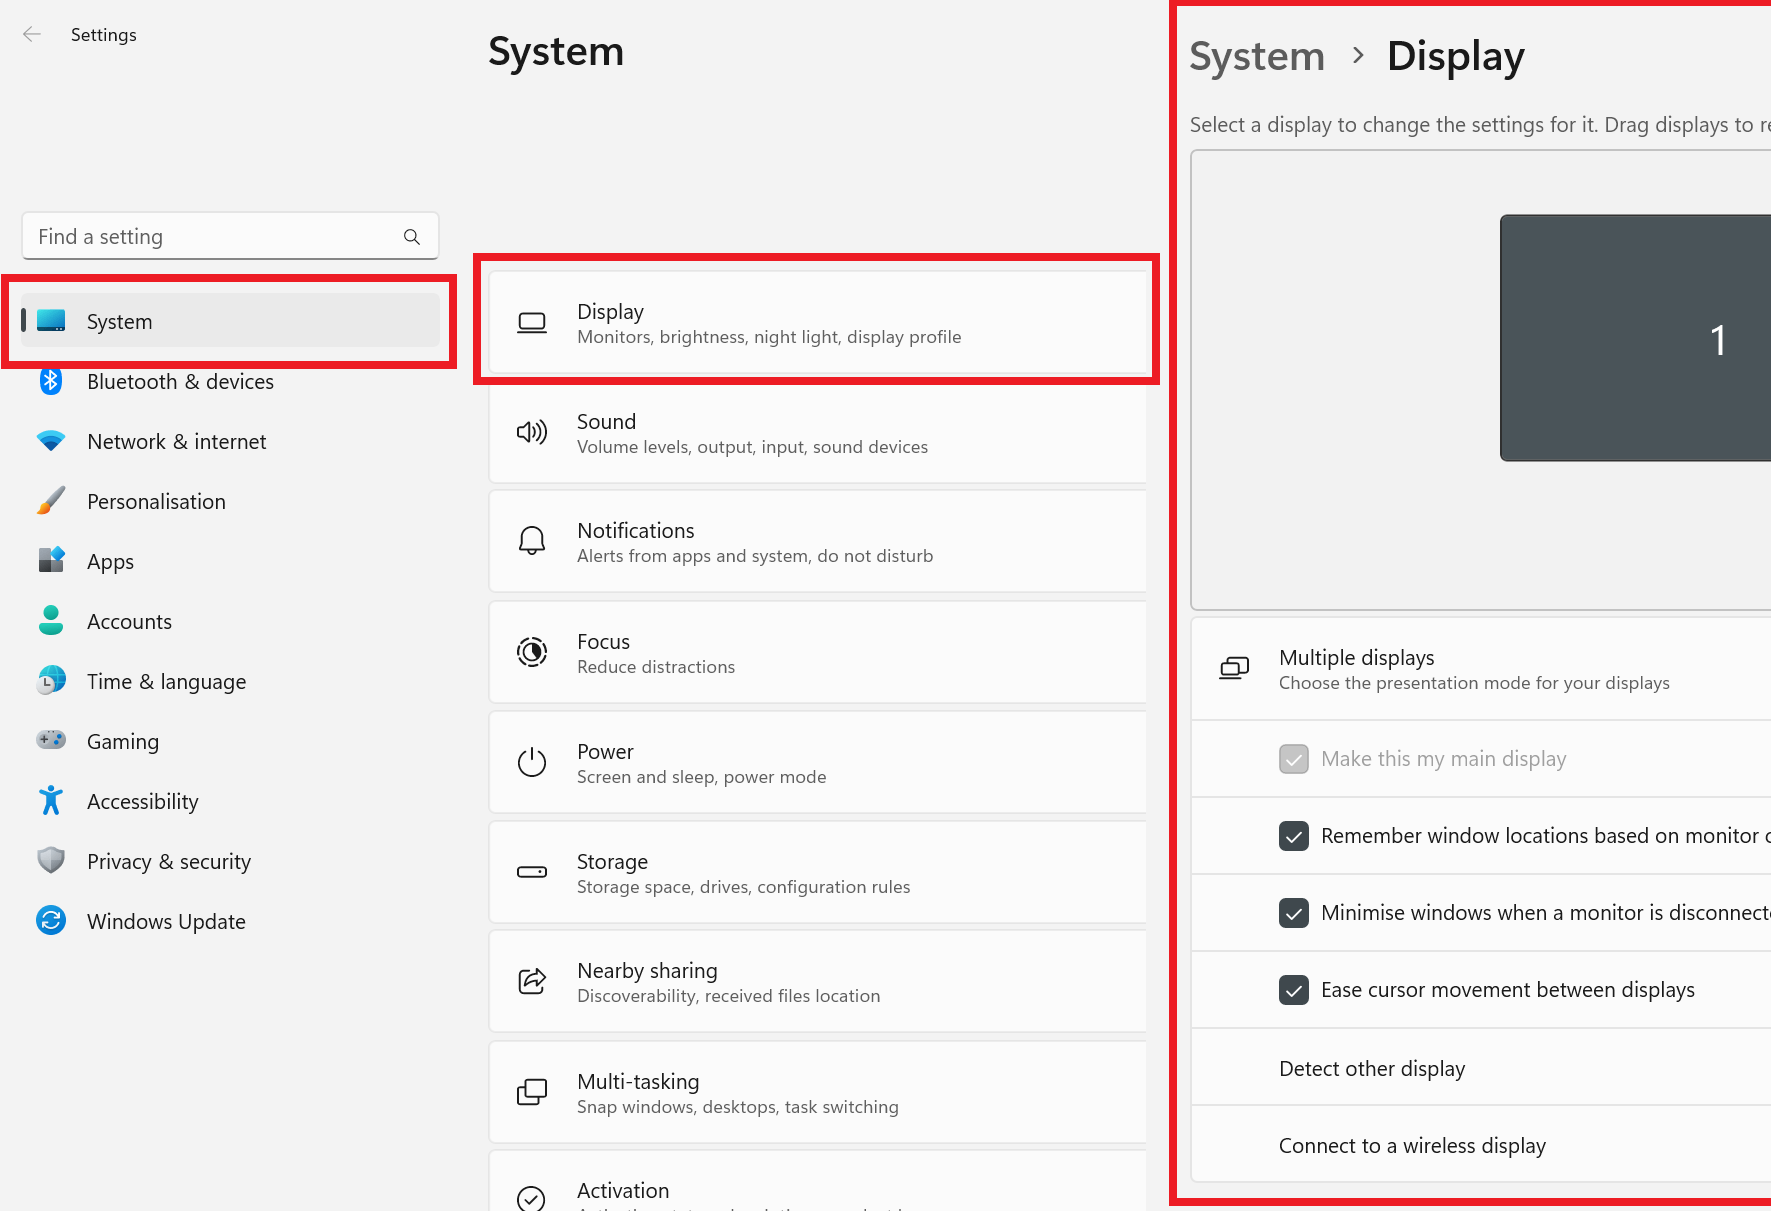
We'll be using Windows 11 for all the screenshots in this article. For users of Windows 10, you'll need to click on System first, then Display to see a similar screen, where everything you need to alter will be located.
For now, let's focus on the first part of the setup process – configuring how the monitors are arranged within Windows. One monitor will have to be set as the primary and the rest will be secondary.
By default, the primary monitor displays the Start Menu, system tray, clock, etc, whereas secondary monitors are either used to duplicate or extend the desktop. To do this in Windows 11, click on Multiple displays, to drop down more options.
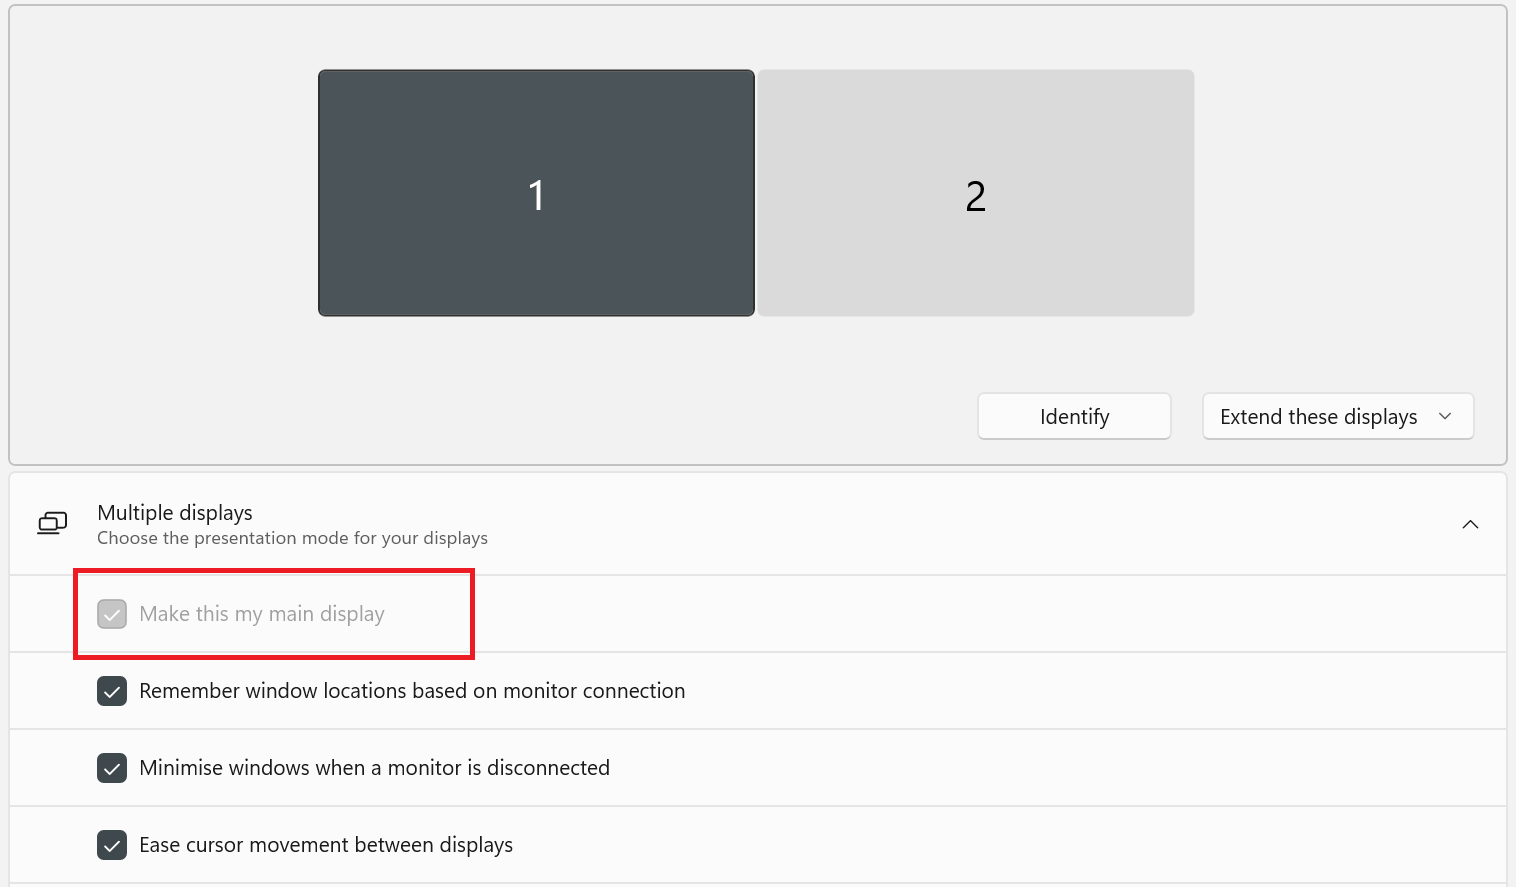
Select the monitor you want to be primary and then check the Make this my main display option – in the image above, monitor 1 is primary, and monitor 2 is secondary. If we wanted it to be the other way around, it'd simply be a case of clicking on the second monitor and ticking the option.
While we're here, let's briefly cover the other tick options:
- Remember windows locations based on monitor connection is useful if you're using a laptop that you have to detach from other monitors; using this option will force the to remember what monitor was being used for various windows. So as you dock and undock the computer, windows will reopen where you last had them.
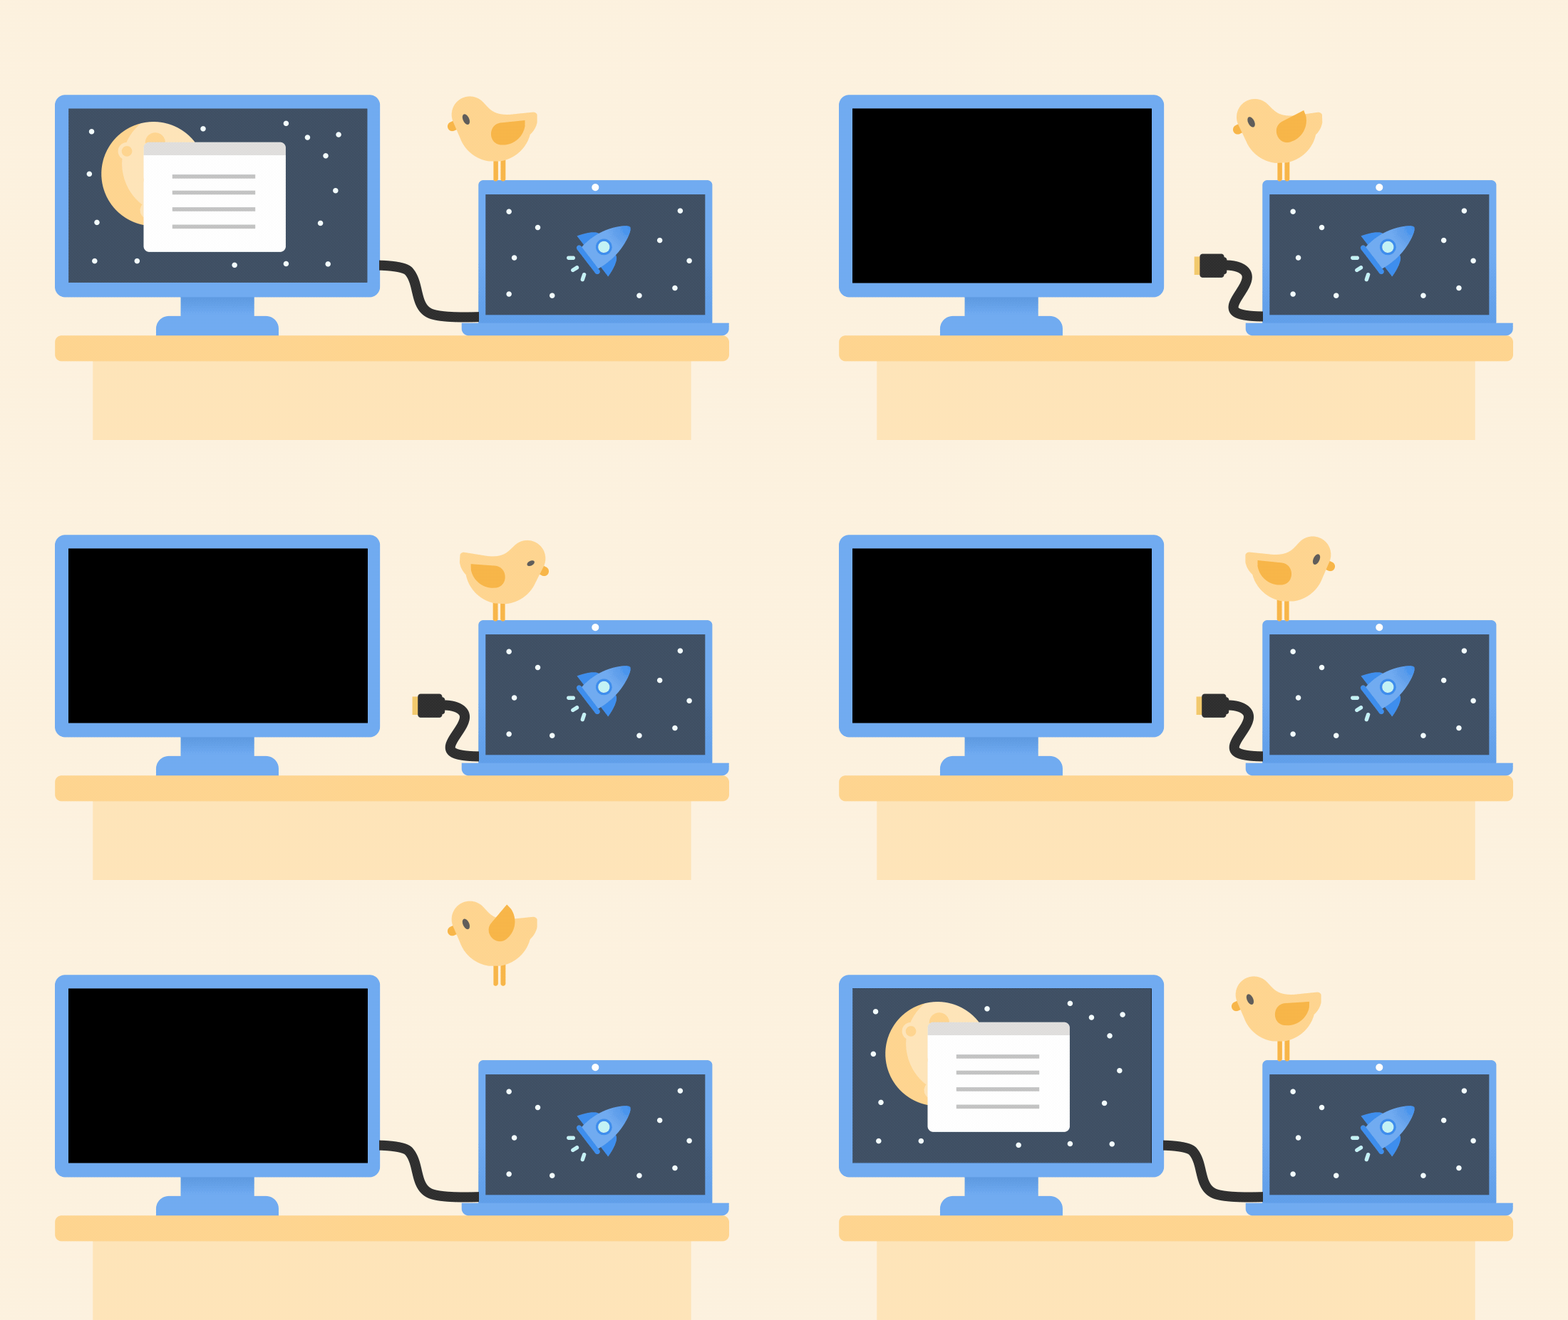
- Minimize windows when a monitor is disconnected is related to the last one and does exactly what it says! Enabling this means when you remove a monitor, any windows that were being displayed on it are minimized, rather than left open and running.
- Ease cursor movement between displays is essential for multi-monitor displays that aren't the same size/resolution. With the disabled, the cursor can get stuck in corners, if the monitors don't line up but with it enabled, the cursor will always jump between the screens.
These additional options are only present in Windows 11. Some of this behavior is supported in Windows 10, but there isn't an easy way to control it.
Setting the role and place for the additional monitors
For this article, we have two monitors that are physically side-by-side, with the primary to the left. We also have the secondary monitor as an extended desktop – this means when the cursor is moved over to the far right, it appears on the secondary.
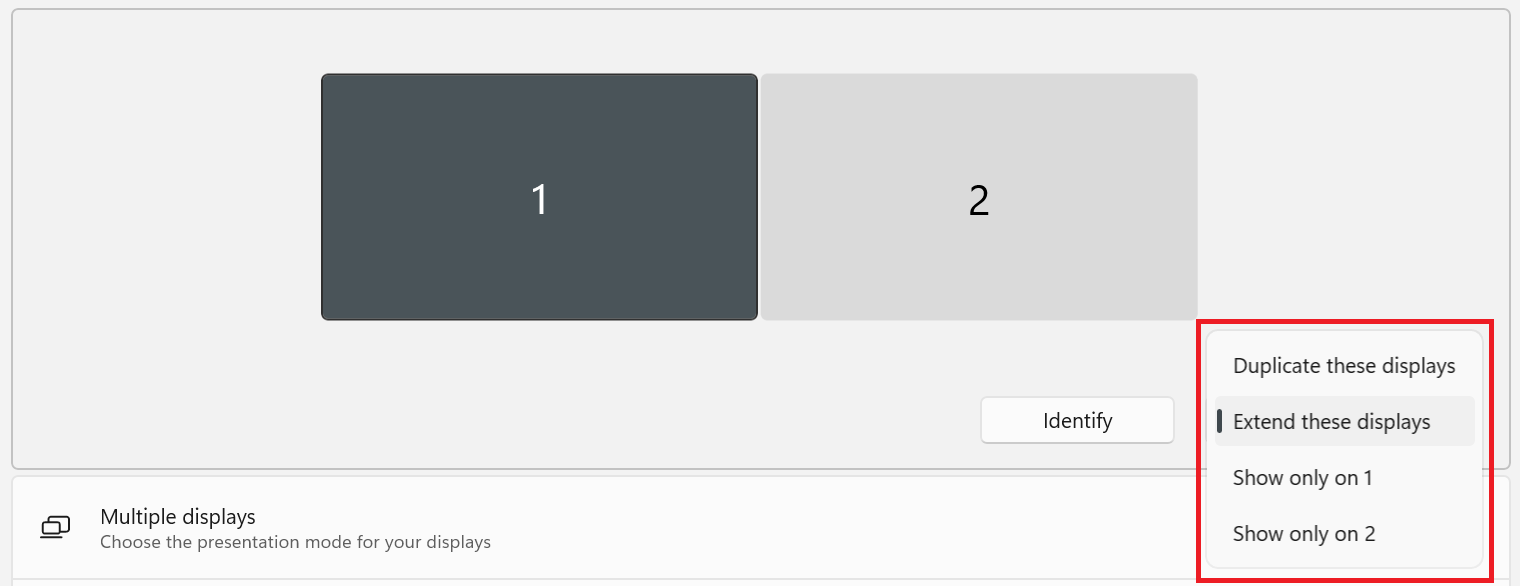
To alter this, click on the menu to the right of the Identify button (this will make the monitors display a number, telling you which one it is in Windows). You'll be presented with four options.
- Duplicate these displays will force all monitors to show what's on the primary monitor – this is useful if you're demonstrating the use of a program and want to show it to other people, for example.
- Extend these displays essentially just gives you an extra wide desktop.
- Show only on... options will disable one or more of the attached monitors, leaving only the selected one active. This might seem a little redundant if the monitors are close to you, but if they're some distance away (e.g. a ceiling-mounted projector) then it's a handy way of preventing anything from being displayed on them.
To do this in Windows 10, you'll need to scroll all the way down to the bottom of the Display setting window, to the Multiple displays options.
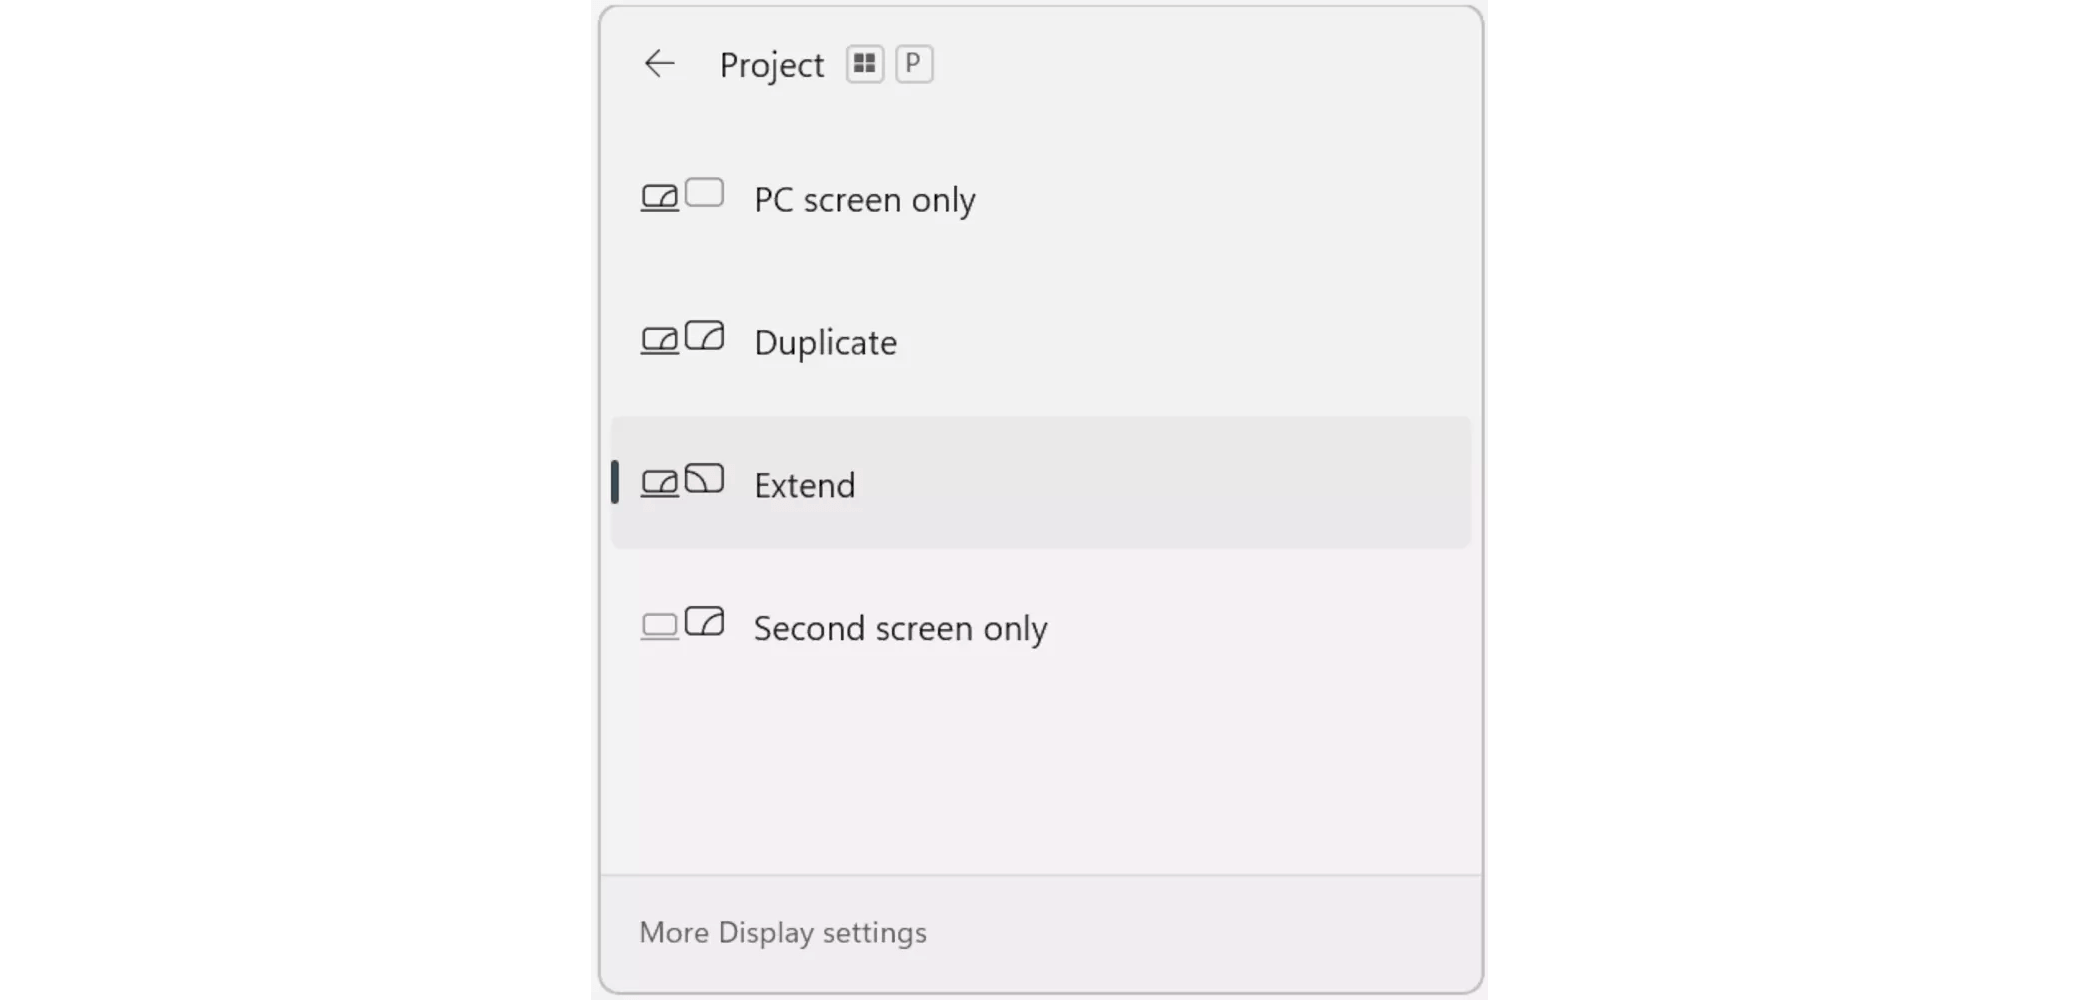
A quicker way of changing these settings, in both Windows 10 and 11, is to press the Windows key and P together. A small window on the right of the primary monitor will open up showing you the same options.
Now, let's go back to how we have the monitors arranged. Although they're physically side-by-side, with the primary on the left, they don't have to be this way in Windows. Let's say we actually want to extend our desktop below the main display and not to the right.
In both versions of Windows, this is done by click-and-holding the monitor we want to move and then dragging it into the desired position. Once in place, click Apply and the new location will be set.

Don't forget that Windows can't tell where the extra monitors physically are, so if you have them vertically stacked or are using three side-by-side, then this step is absolutely required to get the overall display just how you want it.
If the secondary monitors are smaller than the primary, then their placement is vital for a smooth cursor transition, even with the 'Ease cursor movement' option enabled. For example, if the primary is a 4K screen but the secondary is only 1080p, then it will appear to be a quarter of the size in Windows (even if the monitors have identical screen dimensions).
For such cases, it's best to experiment with a few positions, to find one that best suits your style of use. Placing the secondary in the middle of the primary's vertical height is probably the most suitable compromise.
Tweaking the orientation and scaling
Lots of users will use a secondary monitor to display chat/social media apps, such as Discord, while they're gaming or use it to show programming code that's being worked on. In such cases, it can be really useful to have that monitor physically rotated through 90 degrees – i.e. in portrait mode.
But since Windows doesn't know that the screen has been adjusted in that way, the operating system will need to be told this, in order to present the desktop correctly. In Windows 10 and 11, the place to do this is in the Scale & layout section of the Display menu.
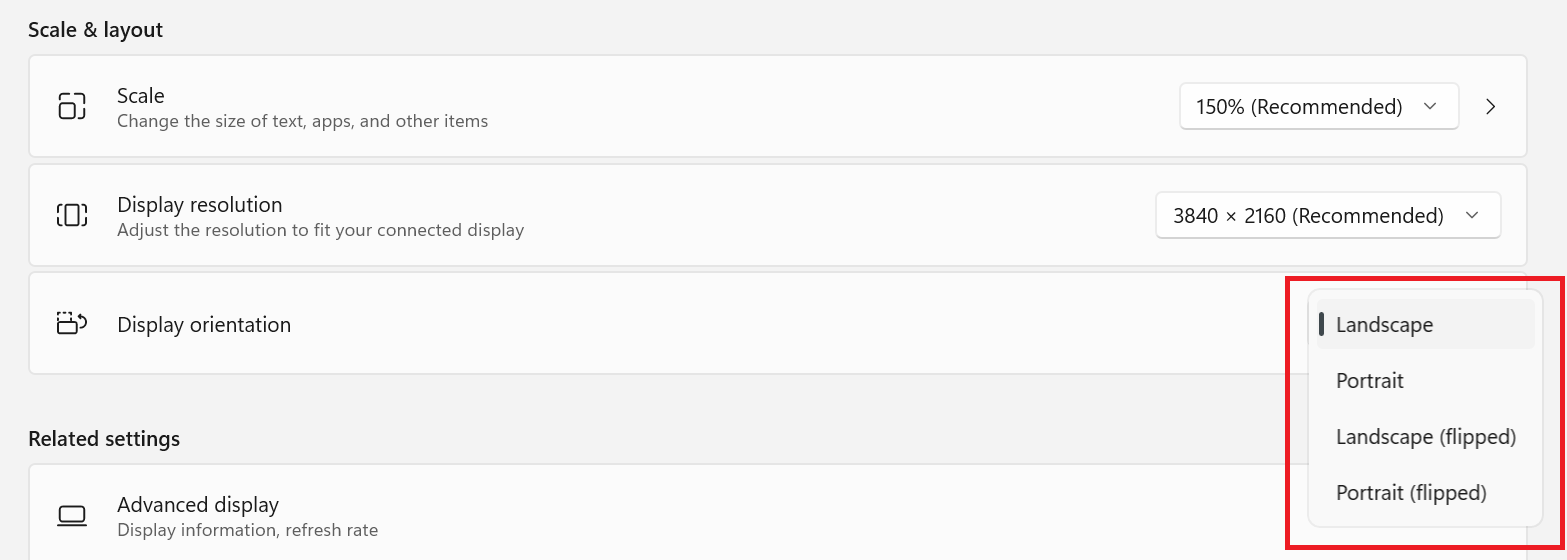
Clicking on the options box in Display orientation will open up four choices: the default Landscape mode, followed by Portrait, and two others.
The 'flipped' modes have the desktop rotated through 180 degrees, to account for how people have their monitors set up. For example, if you've turned it clockwise, to have a portrait orientation, choose the normal mode.
But if you've twisted the display anti-clockwise, pick the flipped option. Don't forget to select the monitor you want to re-orientate at the top of the Display menu first, before doing any changes!
Another setting you may wish to alter, for the extra monitors being used, is the Scale. Applications, text, and icons are all created to a fixed number of pixels, so on monitors that have a very high resolution, they can appear to be very small.
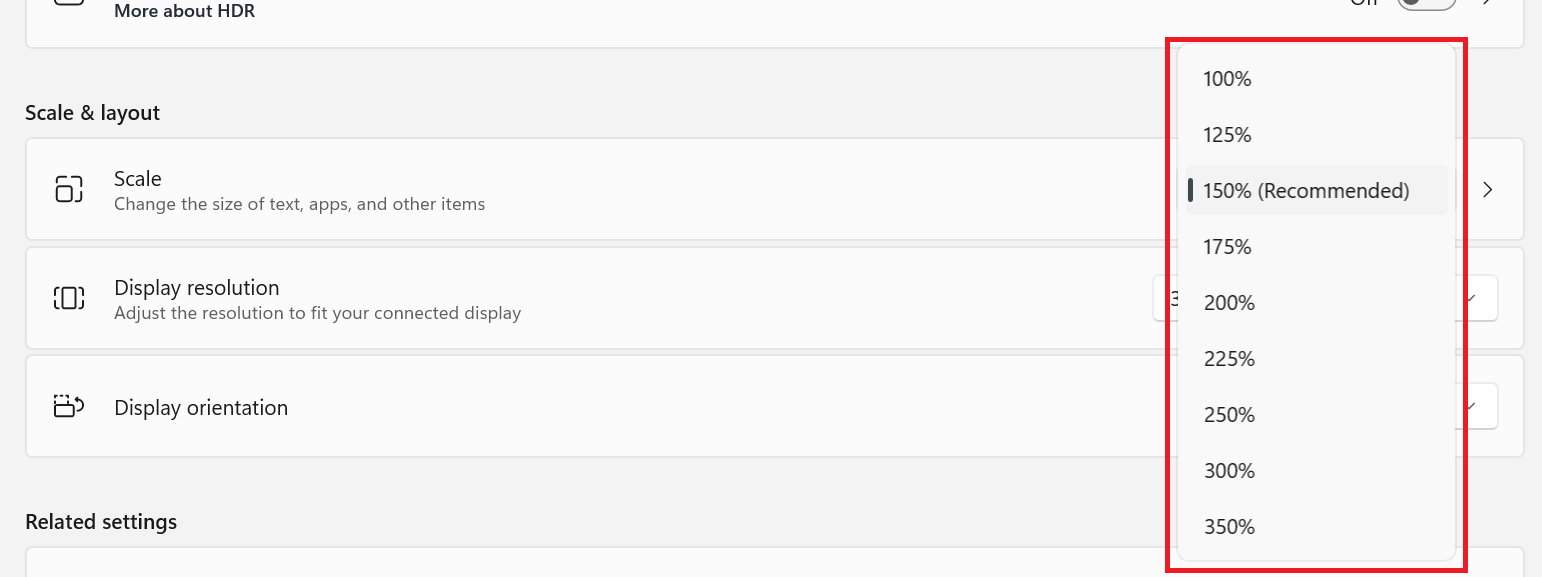
This can be useful if you're after as much desktop space as possible, but it can also be hard on the eyes. Typically, Windows will automatically increase the scaling, making everything appear larger on the monitor when the resolution is set high (e.g. 4K monitors often default to 150%) but you can easily alter this if it's not for you.
You can also set a customized scaling value, such as 135% if you feel that the ones shown aren't quite to your liking – click the arrow to the right of the scaling menu and you'll be shown a new option.
Just be aware that changing the scaling from the default values can lead to some apps not displaying correctly, including Windows itself, and this can make it rather awkward to go back to a normal setting afterward.
Multiple monitors mastered
Everything we've covered so far is enough to set up a multi-monitor display for almost every need. There are some other settings in the Display menu, such as HDR (High Dynamic Range) control for monitors that support it, but these don't really alter how additional screens are arranged and presented, as such.
You may want to change aspects like resolution and refresh rate, but we'd always recommend using the highest or native values wherever possible, especially for refresh rate. All you really need to alter is the location and orientation of the monitors, and then set the desktop to be extended, for maximum real estate, or duplicated for presentation needs.
Now enjoy your productivity boost!
Keep Reading. Tips & Tricks at TechSpot
- Top 10 Hacks for Microsoft Excel
- How to Boot to BIOS in Windows 11
- Top 10 Hacks for Microsoft Word
- How to Activate God Mode in Windows 10 and Windows 11
Masthead credit: Ahmed Sekmani
