Custom Hive Build, Barebone Style
As we just mentioned, getting inside the Beebox to install hardware is very quick and easy. You only have to remove four screws from underneath the Beebox and the bottom cover comes right off.
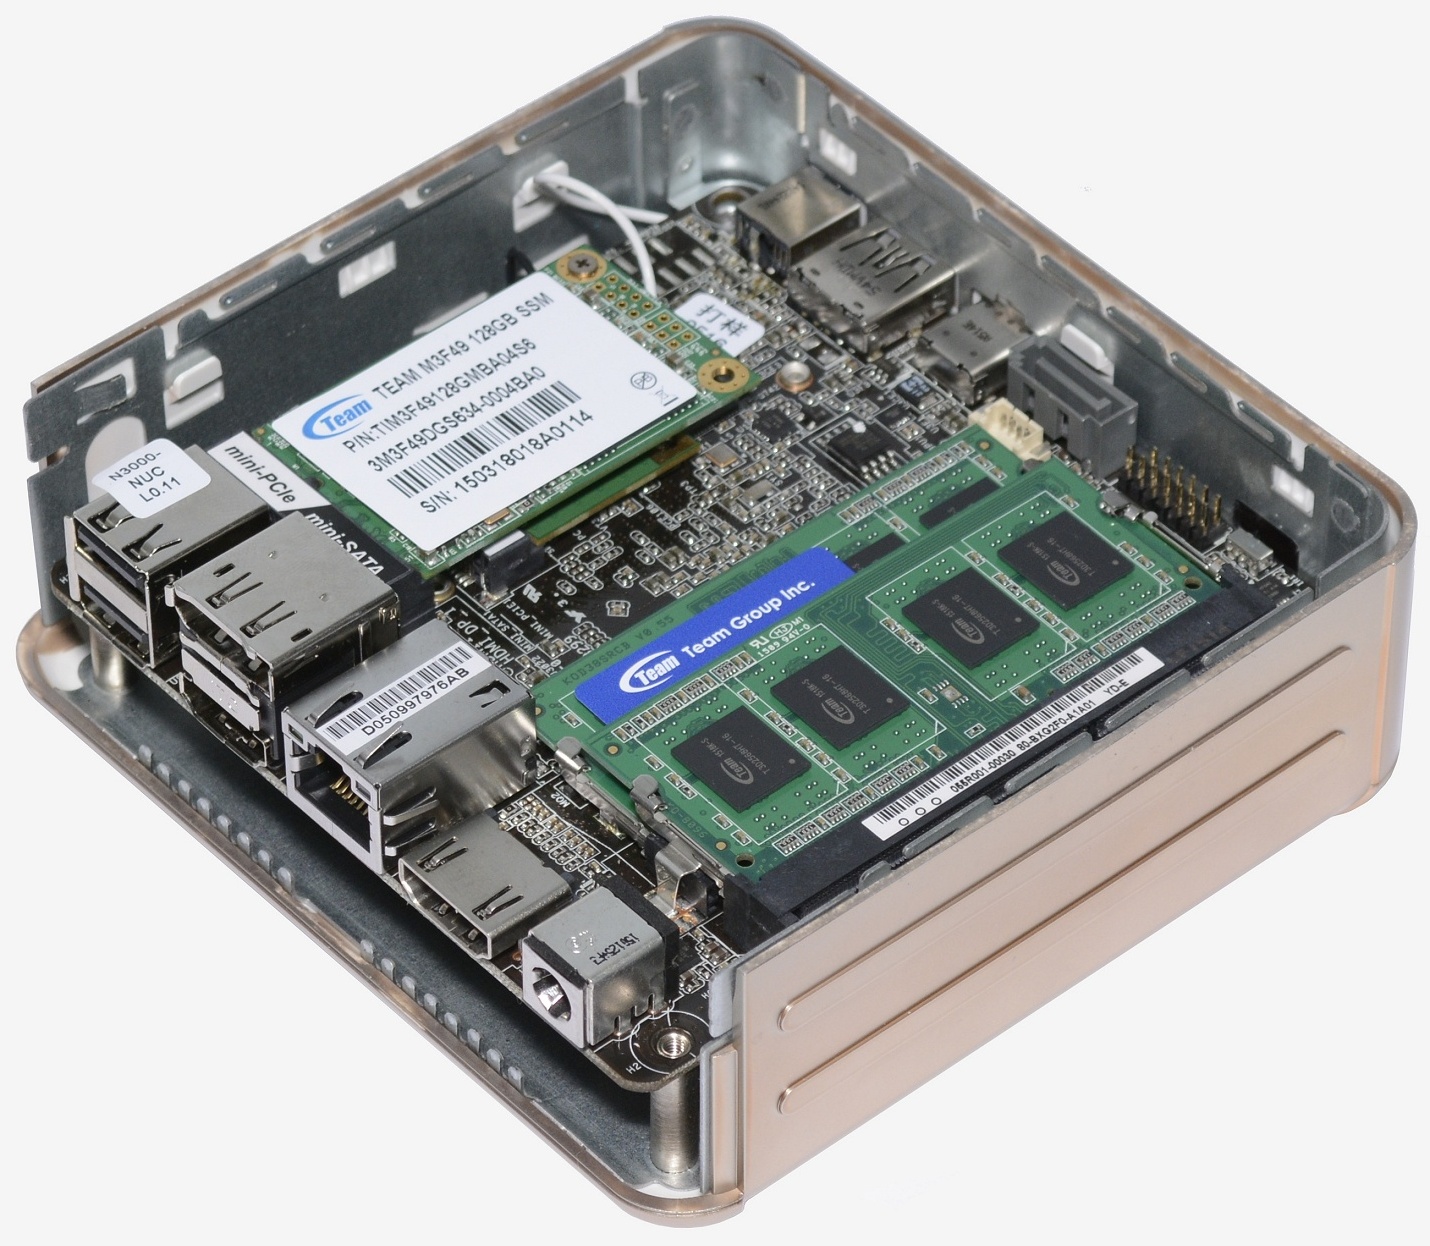
Those that purchase the barebones Beebox will be presented with a motherboard equipped only with the Mini-PCIe 802.11ac WiFi card. You can install up to two SO-DIMM modules along with a mSATA SSD and/or 2.5" storage device.
The mSATA SSD simply slots in over the WiFi card and installing takes a matter of seconds. The DDR3 memory modules also clip right into their SO-DIMM slots. As you would expect there is limited space to work with, but we had no trouble getting either the mSATA or memory modules installed.
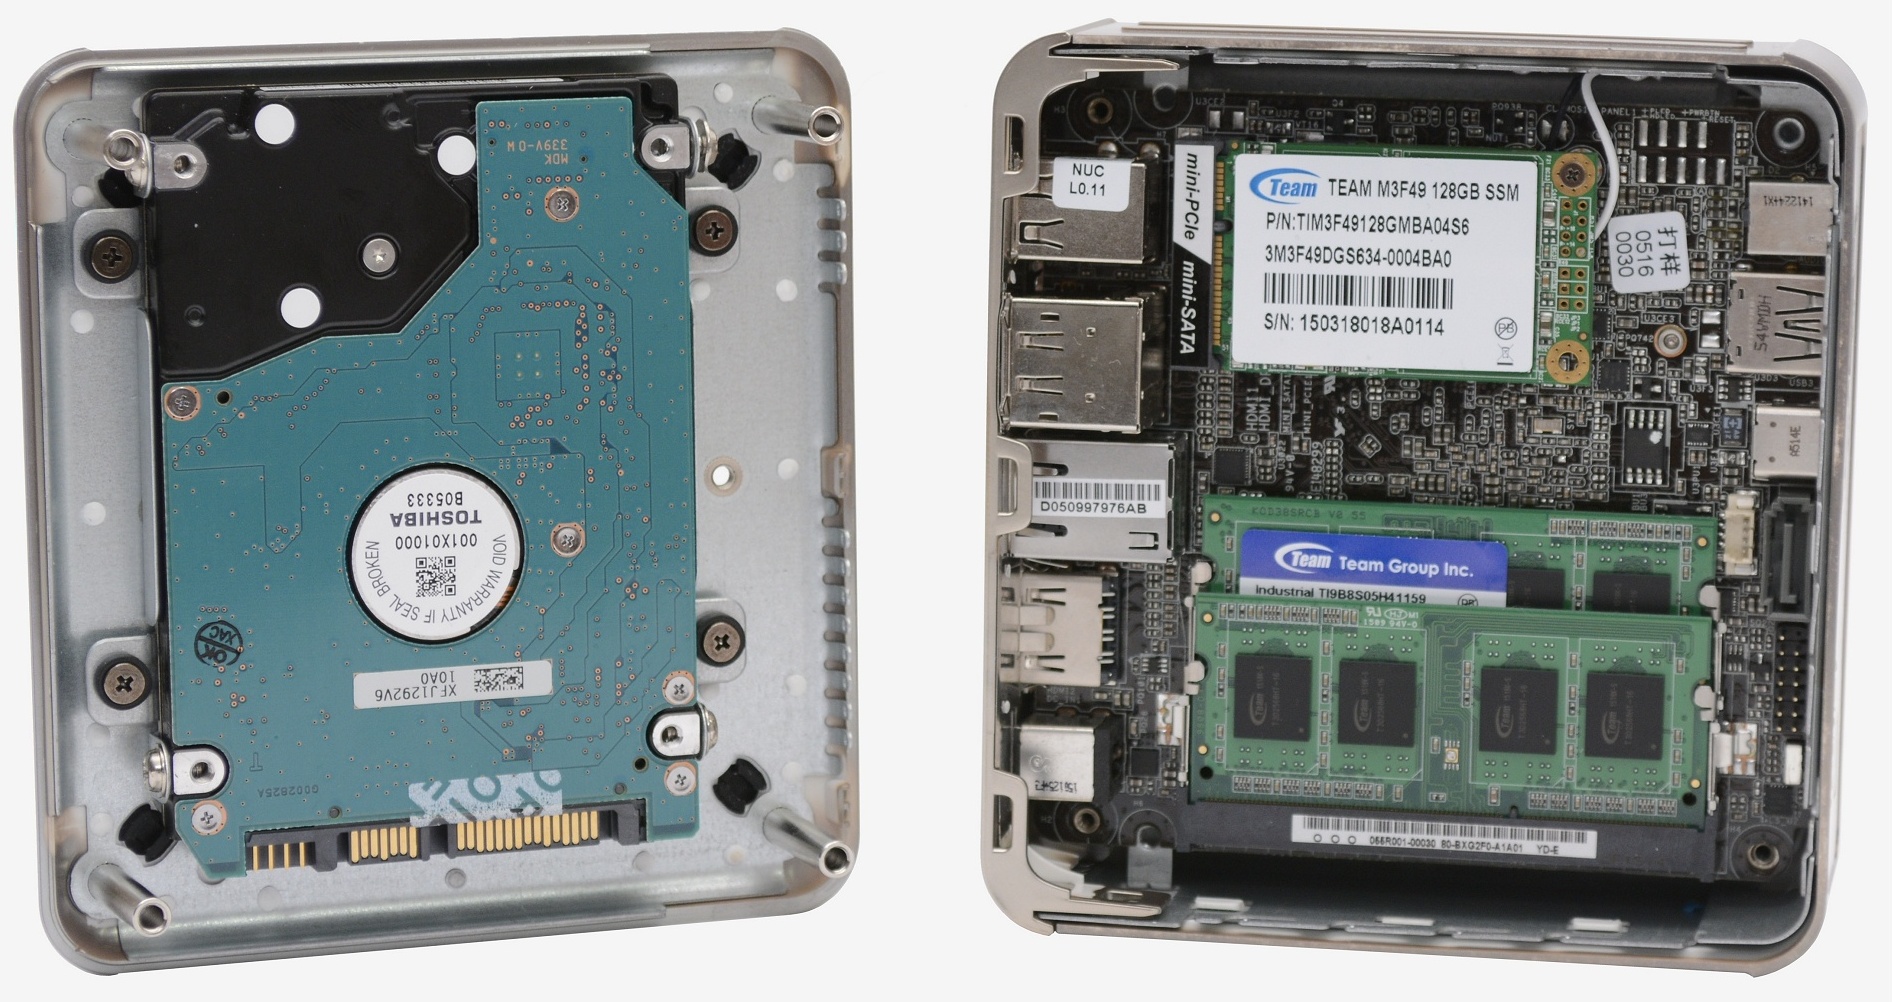
Attaching the 2.5" storage device to the bottom cover is made easy by the fact that the mounting plate is removable via four screws which feature vibration absorbing rubber pads to help reduce any noise that might be generated when using a mechanical hard drive.
With the 2.5" storage device fitted to the cover, the last step involves connecting the supplied custom SATA power/data cable to the main PCB and then to the SATA drive itself. This was again a relatively easy task, though it was followed by a much more difficult task: resecuring the Beebox's bottom cover.
As the Beebox is a rectangular shape rather than a perfect square, the cover only fits two of four possible ways. However with the 2.5" storage spot occupied there is just one correct way to fit the cover back on and once you have figured that out it's still no easy task.
Up until this point the Beebox has been a well-designed and well-built mini PC, but in order to fit the 2.5" drive to the bottom cover Asrock has used a 90 degree data/power cable to reduce the length of the unit. This is fine – perhaps even the perfect solution in theory. The issue is that the 90 degree cable has nowhere to go inside the case.
Due to the orientation of the 2.5" slot, the drive either has to face the left or right side of the case. The problem is that the drive cannot face left as the 90 degree cable hits the mSATA storage device before the cover can be secured. Facing the drive in the only other possible direction means that the SATA cable hits the base of the top SO-DIMM slot, though there is more clearance here than on the other side.
The solution was to squeeze the cover back on and secure the screws, something I wouldn't have been comfortable doing if I had paid for any of the hardware inside. As crude and unadvisable as this sounds, the SATA cable was pressed into shape. On the bright side, once this had been achieved we had no trouble removing the cover and placing it back on as the cable had already bent to the Beebox's will.
Besides this one minor battle, the installation process went smoothly and the Beebox proved easy to configure.


