Configuring CGMiner
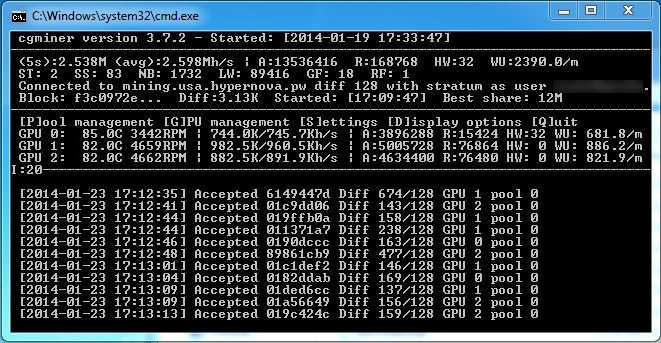
At this point, you're ready to launch the mining program. Double-click on the .bat file you created and CGMiner will launch in a DOS-style window. Keep a close eye on your Kill-A-Watt to monitor power usage and make sure you aren't pushing the power supply too hard. If you are getting close to the maximum rated wattage for your PSU, a more powerful unit would be a good idea.
Don't be surprised to see the system shut off completely if you stress the PSU too much or if something starts to overheat. To give you an idea of what to expect, our project build pulls down a little over 1,200 watts under full load and runs in the low- to mid-80C range, which is a bit toasty but still a fair amount lower than the 95C that AMD claims its R9 290x cards can operate at – obviously the cooler the better.
Here's where things can (and likely will) get a bit tricky as there are many settings to get the most out of your GPUs. The good news is that most of the settings are straightforward and there are plenty of resources online to help. The bad news is that each card (and system) is different, even if they are the exact same make and model. Things only get more complex as you add additional cards to the mix.
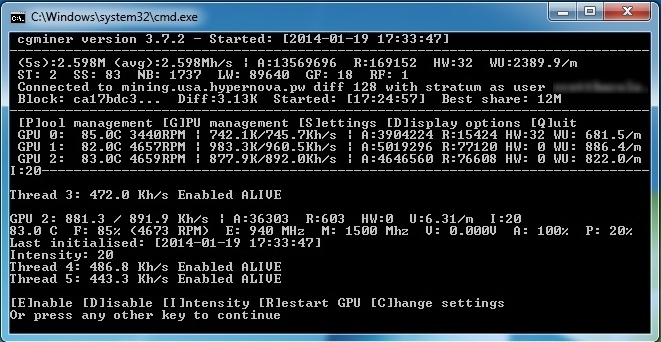
When initially tweaking your system, you'll probably want to adjust settings directly in CGMiner. Settings can also be adjusted directly in the batch file but I found that it's easier to do so directly in the program with keyboard commands. Once you find the optimal settings they can be saved to a configuration file that will load each time you launch the program.
I'll give a brief rundown of the most common adjustable settings in CGMiner and what each one does, but keep in mind that these are just the settings we used and you should adjust settings for your miner at your own risk. Or in other words, we aren't responsible if you somehow manage to fry your hardware. If that sounds scary, we recommend combing through CGMiner's readme. Here are my settings:
Intensity (the amount of work the GPU has to do in one "go" before it can return its result): This can be set as high as 20 and the higher the value, the less responsive your system will be. If you are building a dedicated miner, a less responsive system really won't matter since you won't be using it anyway. If you are planning to mine on your main computer, a lower Intensity will let you mine in the background.
In testing, I found the sweet spot for 280x cards is around 13 while all of the 290x cards I've tried perform best at 20. I'd start at 13 and work your way up from there. Keep an eye on your hash rate (shown as Kh/s) and the hardware error field (shown as HW) when tuning this setting and all others. If your hash rate starts to drop or you start seeing hardware errors, dial back the Intensity a notch.
Engine and Memory: Engine is the clock speed of your GPU while Memory is the speed of its VRAM. Sadly, conventional wisdom doesn't always apply to CGMiner. I've been an avid overclocker for 14 years but I quickly realized that higher clock speeds – even on a totally stable system – don't always equate to better mining performance. As with Intensity, play around to see what produces the best results. On the 280x, I found an engine speed of 1080 and a memory speed of 1500 worked best, while one of the 290x cards preferred 1000 engine/1500 memory and the other ran best at 940/1500.
Fan and Voltage: Fan speed is adjusted by total RPM percentage and the setting you choose will depend on a ton of other factors related to cooling and how much noise you're willing to put up with. I ramped up the fans on the 280x to 100% and left the 290 cards running at 85% each. With an ambient room temperature of around 72F during the day, all three cards sit in the mid-80C range and drop into the mid-70C range at night with the air conditioner set to 64F. Voltage lets you manually set the voltage for your card(s). Most R9 cards I've tried are voltage-locked so I didn't bother messing with this setting.
Powertune: This will let your cards draw more power if needed. A value of "0" is the default so they will only have access to their manufacturer-specified power draw. Looking at both extremes, a value of "-20" will keep the power consumption 20% lower than supported from the factory while setting it to "+20" will open it up to 20% more juice. I put everything at +20 and haven't had any problems.
As I did early on, you'll probably discover that the GPUs aren't listed in "order" as they are on the motherboard. For example, GPU 0 in CGMiner is actually the 280x card which is in the bottom slot on the motherboard. I found the easiest way to determine which card is which (especially if you are using identical cards) is to adjust the fan speed. Dropping it really low and then setting it to full speed will make it easy to pinpoint which card is associated with which GPU in the mining program.
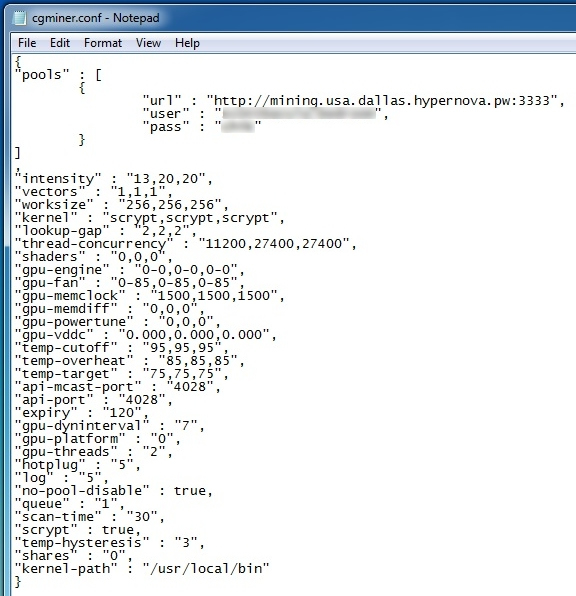
Once you hammer down some settings that work for you, you can go into the Settings menu in CGMiner and write a Configuration file. This file will save your tweaks and load them each time you run the program. As you feel more comfortable with CGMiner, you'll likely want to move to editing the Configuration file directly. It's listed as "cgminer.conf" in the main CGMiner folder and can be edited using Notepad. You'll find even more settings here to get the most out of your GPUs.
Of particular interest is thread-concurrency which is described as the optimal size of work that can be done. I found this setting to have a profound effect on the overall performance and stability of my miner. If set incorrectly, cards would often fail to initiate in CGMiner and would instead output some very random errors. A value of 11200 worked best for my 280x while the 290x cards preferred 27400.
Some say that Worksize is also worth adjusting although I couldn't tell a huge difference between settings and ultimately left it at 256. You may also notice that I left Shaders at default. This is because thread-concurrency overrides anything in this field.
There are several other options that can be tweaked in the Configuration file or directly in CGMiner but what I've outlined here should at least get you up and running with a basic understanding of some of the key settings.


