How to Encode HEVC: Utilizing Nvidia GPU Hardware Acceleration
If you happen to have a Maxwell-based Nvidia graphics card from the GeForce 900 series or later, you can utilize your GPU's dedicated HEVC encoding block to transcode videos into HEVC significantly faster than by using Handbrake. While only some 900 series GPUs feature a HEVC decoding block, all include HEVC encoders, which is going to come in handy.
While performance is significantly improved by using Nvidia's HEVC encoder, NVENC, it comes at a cost of quality. Simply put, you're not going to get as good a quality at the same bitrates using Nvidia's encoder compared to using Handbrake. You can check out a comparison on the pages that follow, but essentially the quality of Nvidia HEVC encodes is equivalent to a good H.264 encode, albeit with a much faster encode time.
Anyway, if you want to use NVENC to encode HEVC videos, you'll need to download a program called StaxRip. The version I used for this guide was x64 1.3.1.7 beta.
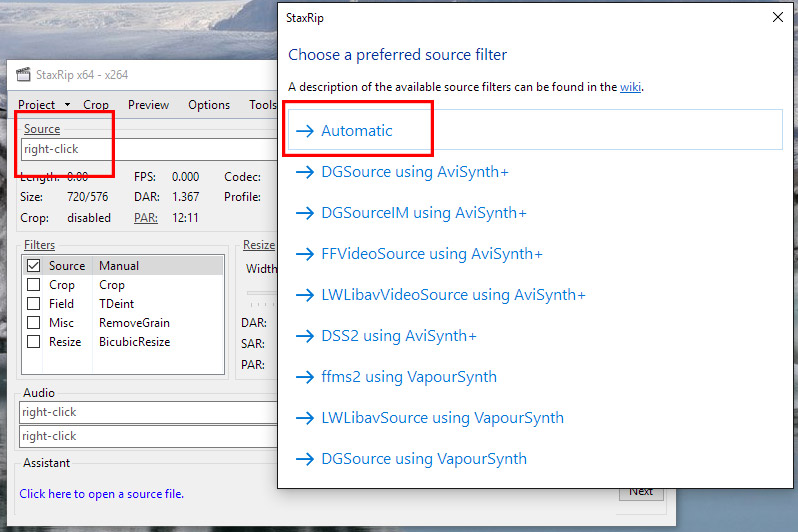
- The interface for StaxRip is quite different to Handbrake. Firstly, you'll want to drag your source file into the Source box, click Automatic when the pop-up appears, and then click okay. The program will then briefly demux the file to prepare for encoding.
- After that's done, you'll want to keep most of the settings at their default, making sure to set the target file to wherever you want the new file saved.

- One thing you will want to change is the encoder. Click on the x264 text and change this to Nvidia H.265.
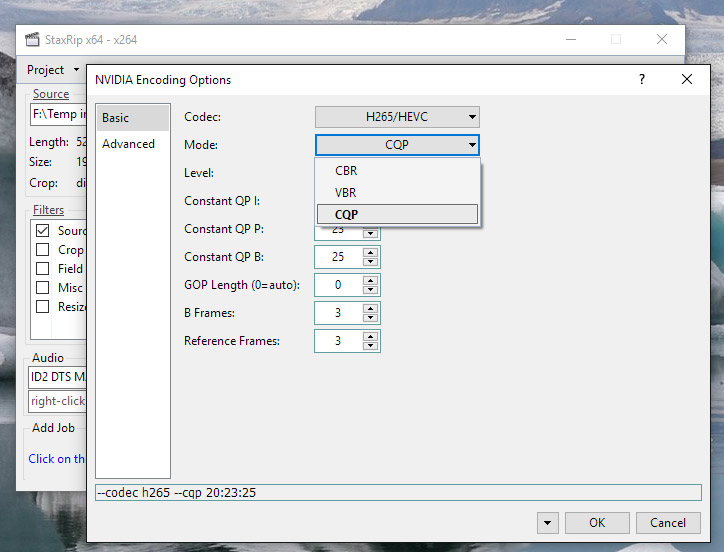
- Then, click on Encoder Options under the Nvidia H.265 header, and change the mode to CQP. Leave the other values at their defaults.
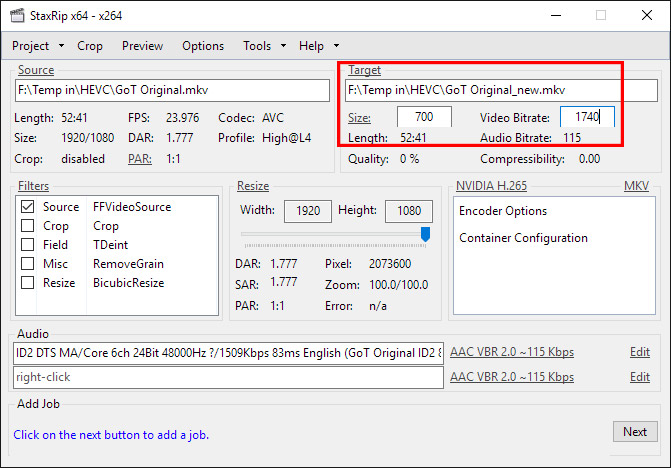
- Optional: Instead of selection CQP as the mode, select VBR. Then go back to the main StaxRip screen and change the video bitrate to whatever you feel is appropriate. You'll probably need a bitrate of at least 2,500 kbps to achieve good quality for a 1080p file, in which case leaving the setting on CQP is a better choice. However, if you want to experiment with bitrates rather than quality selections, VBR is the mode for you.
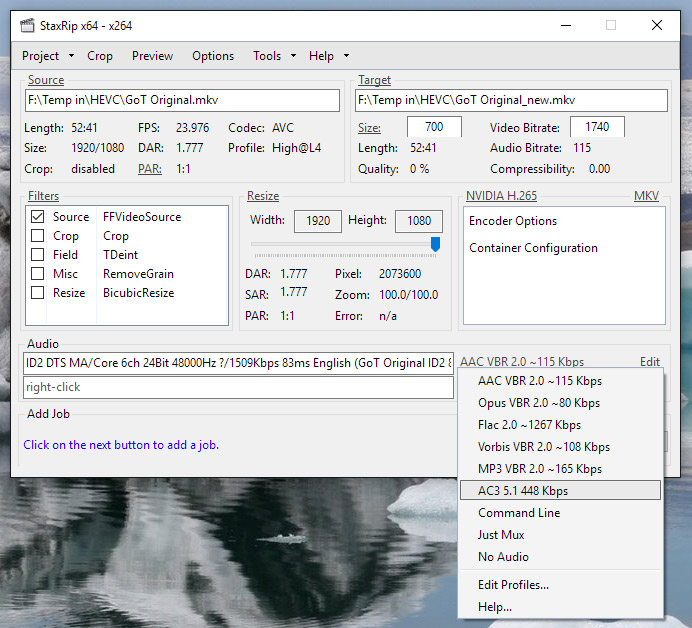
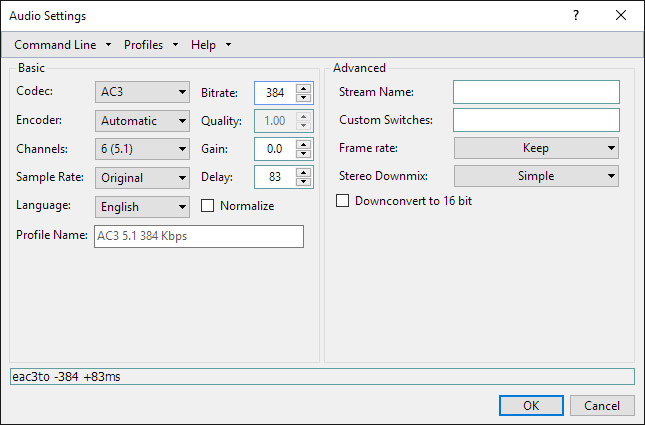
- After choosing CQP mode, or optionally VBR, return to the StaxRip main screen. From there, click on the "Edit" text next to the audio box that by default should say "AAC VBR 2.0 ~115 Kbps". In this screen choose AC3 as a codec with 6 channels and a quality of 256 kbps. Also, uncheck the normalize box. Again, you can play around with these settings to adjust the audio delivered with your video.
- Click Next, then Start to begin the encode. Eventually it will complete itself and notify you in the log screen that appears.
