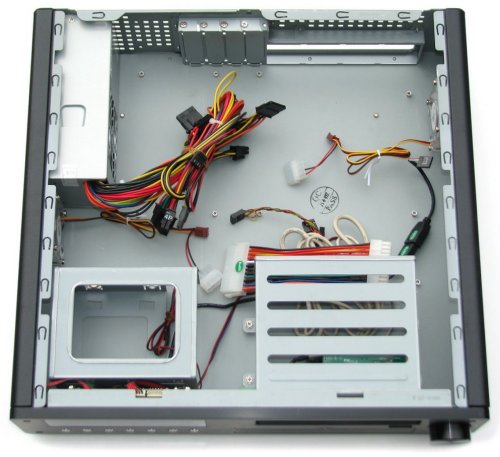
GlacialTech Altair A381 (Internals)
Similar to the Antec case, a single thumb screw needs to be removed at the rear of the case to remove the lid exposing the internal workings of the Altair A381.
Once inside the case it becomes hard to believe that a standard size ATX motherboard can fit in here. With a little encouragement it is possible to do so, though having done it ourselves, we don't really recommend it.

Already installed into the Altair A381 are eleven fixed motherboard mounts which we found a little puzzling. This is because we decided to install a standard ATX motherboard first which would have ended badly had not realized that two of the non-removable mounts would have shorted the board, likely destroying it. These mounts are non-removable so we had to place rubber washers over them. These washers are not supplied and were a total improvisation on our part.

Installing a micro-ATX motherboard is much easier and there are no fixed mounts in potentially risky locations. While we expect that these low-profile cases are going to be a little crammed inside, the Altair A381 takes it to the extreme where everything becomes a chore. In order to install any 3.5" drive the 5.25" bay must be completely removed which is a real pain once the case is loaded with hardware.

Then there is the matter of the power cable which requires a second extension cable to power/activate the front panel. This extension cable takes up quite a lot of valuable room within the Altair A381 and we often found ourselves wondering where to stick it. Overall the cable management is very poor and quite a lot of effort will go into creating a neat and tidy install with this case.

Cooling the internals are two 60mm blue LED case fans, both used as exhaust fans. Why these fans have blue LEDs is beyond us and look tacky in the Altair A381. The fans do not seem to move much air and that is probably because of the case which is highly restrictive, a fan grill would have been a better solution rather than drilling a few holes.