Serving tech enthusiasts for over 25 years. TechSpot means tech analysis and advice you can trust.
When you buy through our links, we may earn a commission.
Every single desktop PC, console, or laptop has one of these. It won't boost your frame rate, nor does it have billions of transistors, and it's not manufactured using the latest chip process nodes. That might sound boring, right? Not at all! The power supply unit is incredibly important because, without it, our computers would do absolutely nothing.
While power supply units don't make flashy headlines like the latest CPUs or GPUs, they're seriously cool pieces of engineering. So, let's put on our virtual lab coats and dissect the humble PSU, breaking down its components and seeing how each piece plays a critical role.
You might have a PC at work or at home. Maybe you use it to file tax returns, play the latest games, or even build and customize your own system. But how well do you really know the components that make up a PC?
Many computer parts have names that require a bit of tech knowledge to understand exactly what it does (e.g. solid state drive) but in the case of the power supply unit, it's pretty obvious. It's a unit. And it supplies power!
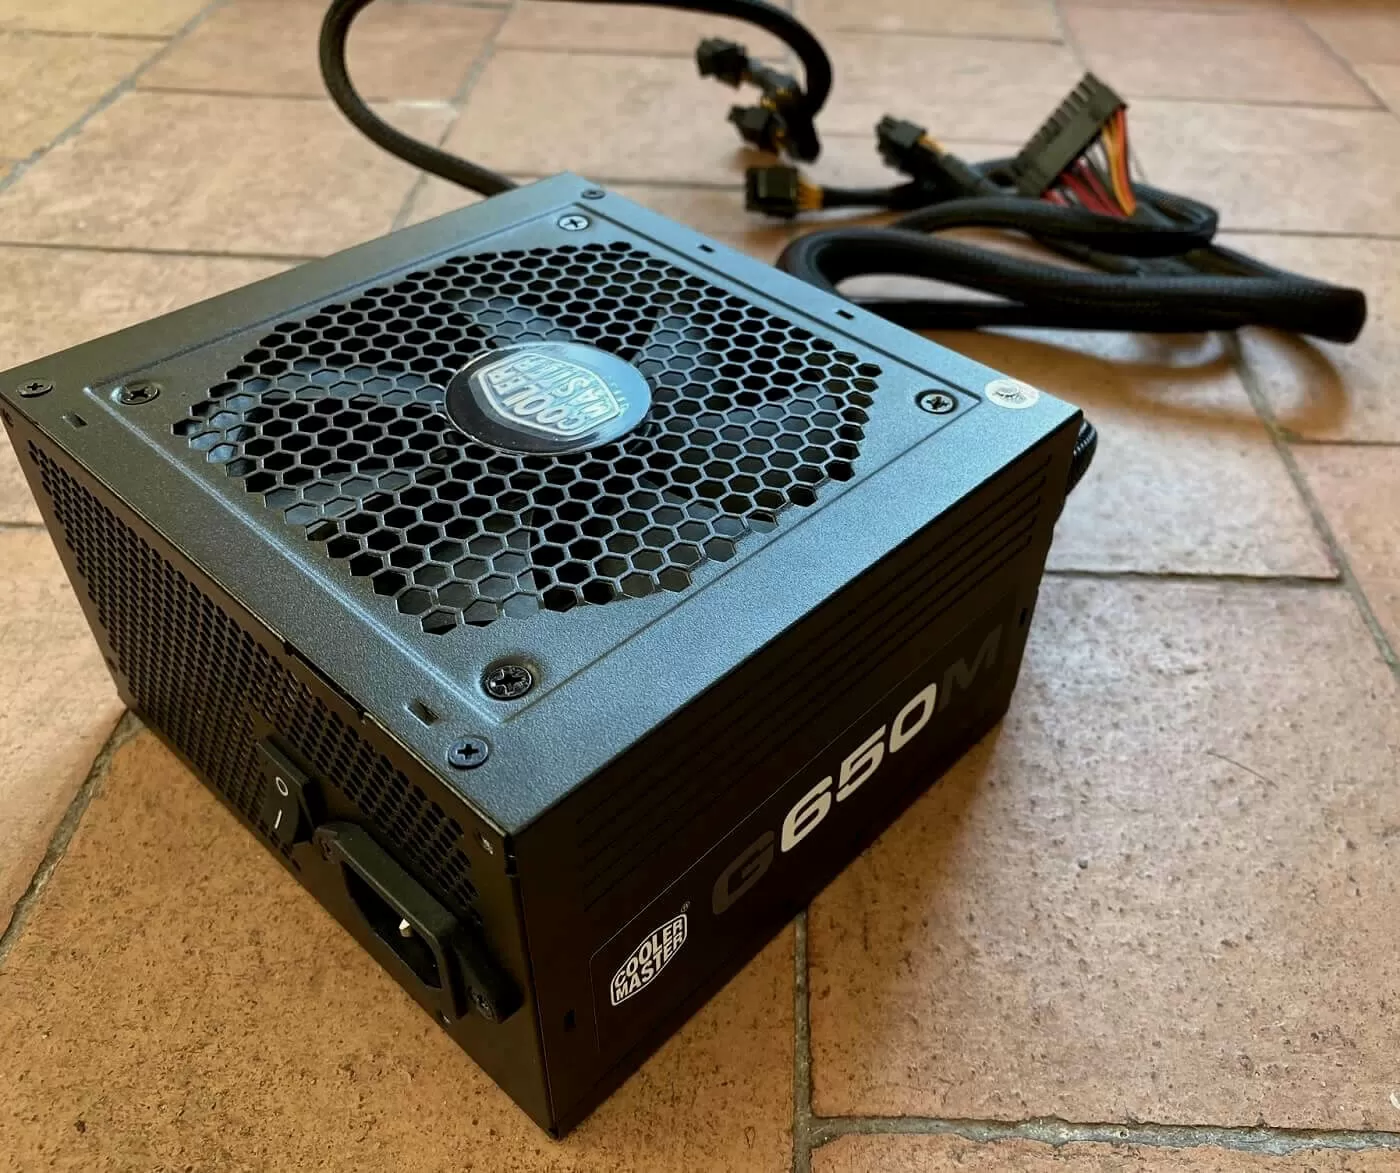
Since we can't just dust off our hands and proudly say "article done" with that kind of statement, we better start having a look at one. For this article, we are examining a Cooler Master G650M. It is a fairly standard (if older) unit with a design that is similar to many other PSUs on the market. It also includes one particular feature not found in every PSU, which we will explore later.
This PSU is built in the standard ATX form factor and follows the ATX12V v2.31 specification. This means it will fit in most computer cases. There are other form factors for smaller or specialized cases, such as those used by certain vendors or servers.
While many PSUs share the same width and height, the length may vary depending on the design. As of writing, newer PSUs often comply with the ATX 3.0 standard, which adds features such as support for the 12VHPWR connector used by modern high-end GPUs.
A Cisco model PSU - specifically designed for rack mounted servers
PSUs are also usually labelled by how much power they can supply as a maximum; in the case of the Cooler Master, it can provide up to 650 watts of electrical power. We'll see what that actually means in this article, but you can get PSUs that deliver just a small number of watts, as not everything computer-wise needs hundreds of watts to run. The majority of desktop PCs will run fine in the range of 400 to 600 W, though.
PSUs like this one are contained within a metal box, usually black or bare metal, so they can be heavy. Laptops nearly always have a PSU that sits externally to the computer and is almost always plastic, but the insides are very similar to what we'll see in this one.
Most desktop PC power supplies come with a switch to isolate the mains electricity supply and a fan to keep things nice and cool, but not all do (or need to). Not all of them will have a metal body full of holes, either – those found in servers rarely have them.
But as you can see in the picture above, we've already taken a screwdriver to our example, so let's rip off the lid and jump inside.
I'm back in black: Why computers can't use wall power directly
Before we start rummaging about with the insides of a PSU, let's think about why we even need one in the first place. Why can't we have the computer connect directly into the mains outlet? The answer lies in the fact that modern computer parts are expecting the electrical power to be delivered in a very different form to that provided by the outlet.
The graph below displays how mains electricity (US = blue and green lines; UK = red line) is supposed to be. The x-axis shows time in milliseconds and the y-axis shows voltage in volts. The best way to think about voltage is that it's a measure of energy difference between two points.
If a voltage is applied across a conducting material (e.g. a length of metal wire), the difference in energy will make electrons in the material flow from the higher energy level to the lower one. These are one of the building blocks of atoms, that make up the material, and metals have lots of electrons free to move about. This flow of electrons is called a current and gets measured in amps.
One good analogy for the techno-speak is that electricity can be thought to be like water in a hose: voltage is akin to the pressure you're using, the flow rate of the water is the current, and any restrictions in the pipe acts the same as electrical resistance.
We can see that mains electricity varies over time and this is known as an alternating current voltage supply - or just AC, for short. In the US, the mains voltage alternates 60 times per second, reaching a peak of 340 V or 170 V, depending on the location and supply. The UK hits a slightly lower peak, and varies a little slower, too. Almost all countries around the world have mains outlet voltages like this, with just a few having lower or higher peak voltages.
The need for a PSU lies in the fact that computers don't work with AC: they need a constant voltage, one that never changes, and it also needs to be of much lower level. Using the same graph scales, it looks something like this:
It's so much lower that it's barely visible, but modern computers primarily use +12V, +5V, and +3.3V rails. The -12V rail remains included for compatibility but is virtually unused by contemporary consumer hardware. Because these values are constant, they're called direct current or DC, for short. So a big part of what a PSU does, is convert AC to DC (cue the guitars...). Time to open the unit and have a look at how it does this!
So a big part of what a PSU does, is convert AC to DC (cue the guitars)... time to open the unit and have a look at how it does this!
At this stage, we should warn you not to open a PSU unless you're trained. Even after it's unplugged, large capacitors can store dangerous voltages that may cause severe injury or even be lethal.
The layout of this PSU is similar to many others, and although the make and model of the various parts used inside will be different, they fundamentally do the same thing.
The mains outlet connection to the PSU is at the top-left hand corner of the picture and the supply essentially runs clockwise around the picture, until reaching the output of the PSU (big cluster of colored wires, bottom left-hand corner).
If we flip the circuit board over, we can see that compared to connections on a motherboard, these are broad and deep – they're designed to have lots of current flowing through them. Something else that's immediately obvious is the big gap running down the middle, like a river cutting a path in a field.
This highlights the fact that all PSUs have two clearly defined sections to them: primary and secondary. The former is all about setting up the input voltage so that it can be efficiently changed from the mains supply level; the latter is everything about that change and the processes afterwards.
A smooth operator: How a PSU cleans up voltage spikes
The very first thing the PSU does to the mains electricity isn't about changing it from AC to DC, or dropping voltage – instead, it's all about smoothing out the input voltage. Because we have lots of electrical devices in our homes, offices, and business that switch on and off, as well as emit electromagnetic signals, the varying AC is often lumpy and with the occasional spikes (the length of the variations isn't constant either). Not only do these make it harder for the PSU to adjust the mains, it can also damage some of the components inside it.
This PSU has two stages of so-called transient filters, the first of which is directly applied to input socket, using 3 components called capacitors to do the job. Think of these as being like a speed bump for sudden changes in the input voltage.
The second stage of filtering in this PSU is more complex, but essentially does the same thing.
The yellow blocks are more capacitors, whereas the green rings wrapped in copper wire are inductors (although they're usually called chokes when used this way). Inductors store electrical energy in a magnetic field but this field also 'pushes back' on the voltage supplying the energy – so a sudden spike in the voltage results in a sudden kick back from the magnetic field to suppress it.
The two little blue discs are yet more capacitors and just below them (hidden under a black plastic cover) is a metal oxide varistor (MOV). These are also used to help counter jumps and spikes in the input voltage; you can read more about different types of transient filter circuits here.
This section of a PSU is often the first sign of where costs have been cut to ensure the model hits a specific budget. Cheaper ones will have less filtering, and the cheapest of all will have none at all (which is not what you want!).
Now that we're all smooth and chilled, let's get on with the day job of a PSU: changing the voltage.
Rock down to electric avenue: AC to DC conversion
Remember that the PSU needs to change an AC voltage that might be averaging 120 volts (technically, it's root mean squaring 120 volts, but that doesn't exactly roll off the tongue) and hack that down into DC voltages of 12, 5, and 3.3 volts.
The first thing that gets done is an AC to DC conversion, and this PSU uses a component called a bridge rectifier. In the picture below, this is the flat black object glued to the chunk of metal (which acts as a heatsink).
Once again, this is another area where a PSU manufacturer can cut costs, with cheaper components doing a worse job of the AC-to-DC conversion (e.g. emitting more heat). Now, if the input voltage peaks at 170 volts (which is the case for 120V mains), then the bridge rectifier will output 170 volts DC.
This gets passed on to the next stage of the PSU and in the one we're looking at, it's called an active power factor correction converter (APFC). This circuit adjusts the current flow in the unit to take into account that it is full of components that store and release energy in a complex way; this can result in the actual power output of the unit being less that what you're supposed to be getting.
Some cheaper PSUs use passive PFC, which relies on fixed components and cannot dynamically adjust current draw. It's less efficient and not compliant with modern energy standards, making it unsuitable for high-performance systems.
The APFC can be seen in the image above - those big cylinders on the left are capacitors and they store the adjusted current, before sending them on to the next step in the PSU's chain of processes.
This section tucked behind the APFC is called a pulse width modulation circuit (PWM, for short). Its job is to take the DC voltage and use several field effect transistors to switch the voltage on and off at a very high rate – it essentially converts the DC voltage back into an AC one. It does this because the part of the PSU that turns the mains voltage right down into 12 volts is a transformer. These devices use electromagnetic induction and a set of two coils of wire (one having more loops in the coil than the other) to step down the voltage; however, transformers only work with an alternating voltage.
The frequency of the AC voltage (the rate at which it varies, measured in hertz, Hz) significantly affects how efficient the transformer is – higher is better – which is why the 50/60 Hz mains supply gets changed into one that varies at something like 50/60 thousand Hz. The more efficient a transformer is, the smaller it can be. This super fast switching of the DC voltage is the source of the name for this type of device: a switched mode power supply (SMPS).
You can see 3 transformers in the picture below - the largest generates just the 12 volt output; in other PSUs, the big transformer might make all of the voltages. The next larger one creates a single 5 volt output that we'll talk about in a bit, and the smallest one acts as an isolator for the PWM circuit, keeping it safe from harm and also stopping it from causing interference with other voltages in the PSU.
Various PSUs will have different ways of creating the required voltages, isolating the PWM circuit, and so on. It'll all depend on budget constraints and how much power the unit needs to offer. All of them, though, will need to take the output off the transformer and turn it back into DC.
In the image below, the large chunk of metal is the heatsink for the bridge rectifiers that do this conversion. We can also see in this specific PSU, the circuit board in the middle of the picture corresponds to a cluster of voltage regulation modules (VRMs) that create the 5 and 3.3 volt outputs.
At this stage it's worth talking about something called ripple.
In a perfect world, with perfect PSUs, the varying AC voltage would be converted into a constant, never-wavering DC voltage. In reality, though, it's not 100% spot on, and the DC voltages do vary ever so slightly.
This variation is called the ripple voltage and for a PSU, you want it to be a small as possible. Cooler Master doesn't provide the size of the ripple voltage in the specifications for this PSU model, so we turned to a detailed review to find them. One review by the now-archived JonnyGuru found that the +12V line in their tests had ripple voltage peaking at 0.042 volts (42 millivolts). According to ATX specifications, ripple voltage should not exceed 120 millivolts on the +12V line and 50 millivolts on the +5V or +3.3V lines.
The image below shows you how this compares to what is required. The red line is the targeted constant +12V DC, the varying blue line is what we're actually getting (although the ripple itself isn't constant).
The quality of the capacitors used throughout the PSU play a significant role. Smaller, cheaper ones would result in the ripple being bigger, which is not what we want. If it's too big, then the complex electronic circuitry in the rest of the computer might operate in an unstable manner. Fortunately, in our example, 40-odd millivolts is okay: not great, but not bad.
No matter what is used to create the output voltages and ensure they're DC in form, there's still a few more bits of circuitry needed before we start waving cables out the place. It all relates to managing the PSU's outputs, ensuring that if a high demand for power is taking place on one particular voltage, then the others aren't going to be nobbled in the process.
The chip you can see here is called a supervisor and monitors the outputs, checking that they're not delivering too much or too little voltage and current. It's not very sophisticated, though, as all it does it shut off the PSU, if any of those problems occur.
More expensive supply units use digital signal processors (DSPs) to monitor what's going on, and these can also adjust the voltages if required, as well as send details about the status of the PSU to the computer using it. Not overly useful for the typical PC user, but for computers used as servers, compute machines, and so on, it's often a desired feature.
Plug in baby: PSU cables and connectors
All power supply units come with long bundles of wires, sprouting out of their back. The number of bundles, and how they're connecting to the main unit will differ across the vast array of models available, but they'll all provide some standard connections.
Since voltage is a measure of difference, there needs to be two wires for a given output: one for the indicated voltage (e.g. positive 12 volts, or +12V for short) and a reference wire that the difference is measured against. This wire is known as the ground or common line, and the two form a loop: running out the PSU, to the device needing the power, and then back into the unit.
The flow of current runs through these loop wires, but since some of the loops will only have a small amount of current flowing in them, several ground wires can be shared by different loops.
The first of which is the obligatory 24-pin ATX12V version 2.4 connection - it offers multiple wires for the various voltages, plus a few specific ones.
An important one is the +5V standby wire - for as long as the PSU is switched on and plugged in, this wire is always live. This is because a computer doesn't really switch off, when you tell the operating system to shut down. The motherboard draws the power it needs to remain active off the standby connection.
There will also be another 8 pin connector for the motherboard, that provides two sets of +12V and ground wires, and most PSUs will also provide at least one PCI Express 6 or 8-pin power connector.
Graphics cards can only take a maximum of 75W from the motherboard PCI Express slot, so this connector offers additional power for today's monstrous GPUs.
This particular PSU actually runs two PCI Express power connectors off the same wires, for cost reasons, so if you had a really powerful graphics card in the computer, it would be best to use a separate bundle of wires.
The difference between the 6 and 8-pin PCI Express connector, is an extra two ground wires. This allows a higher level of current to flow down the +12V wires, helping to feed hungrier GPUs.
Modern GPUs, like Nvidia's RTX 50 series, use the now infamous 12VHPWR connector that can deliver up to 600 W through a single cable. Many new PSUs include this connector to meet updated ATX 3.0 specifications.
Over the past few years, we've seen an increase number of power supply units proudly wear a tag of 'modular' in their description. All this means is that some of the power connectors are wired to another connector, that slots directly into the PSU. So instead of having a mass of cables and connectors clogging up the inside of the computer case, you can remove what don't need to save some space.
This Cooler Master model, like many others, uses a fairly basic connection system for the modular cables.
Each connector provides one each of +12V, +5V, and +3.3V wires, along with two ground wires, and depending on what device the cable is going to be attached to, the connector at the other end of the cable will either use the same wiring configuration, or something simpler.
The Serial ATA (SATA) connector above is used to provide power for hard drives, solid state drives, and peripherals such as DVD burners.
This familiar shape goes by the snappy name of an AMP MATE-N-LOK 1-480424-0 power connector. Well, most people call it a Molex connector, but that's actually the name of the company that developed it. It provides one +12V, one +5V, and two ground wires.
The output supply cabling of a PSU is another area where costs can be saved or given a higher budget, either to improve looks or flexibility of the wires. The thickness (or gauge) of the metal wire used in the cables plays a part, too, as thicker wires have less electrical resistance than thinner ones, which results in less heat being generated as current flows through them.
Understanding PSU power ratings
At the beginning of this article, we said that most power supply units are named after the maximum amount of power they can offer. At the simplest level, electrical power is simply voltage multiplied by current (e.g. 12 volts x 20 amps = 240 watts) and while such a statement will have many engineers chomping at the bit to correct this remark, it works well enough for our purposes.
Like most branded or generic models, our PSU comes with a label providing various snippets of information about how much power each voltage line can provide.
Here we can see that the total power available from all the +12V lines added together peaks at 624 W; add in all the others stated on the label and we get a total of 760 W, so what gives? Well, it's down to the fact that the normal +5V and +3.3V lines are created using VRMs off the +12V output of the PSU.
And, of course, all of the output voltages come from a single source: the mains outlet. So the rating of 650 W is the maximum the PSU can provide as a total across all lines. So if you were using 600 W on the +12V output, you'll only have 50 W left for everything else. Fortunately, the majority of hardware inside a modern PC takes the bulk of its power off the 12V lines anyway, so it's rarely a problem assuming you've picked the right PSU model for your needs.
Next to the power specifications, there's a label saying '80 Plus Bronze.' This is an efficiency rating that's part of a voluntary program, not a legal requirement, used to help consumers gauge how efficiently a PSU converts wall power into usable DC power. The efficiency also depends on what size of load the PSU is attempting to serve (i.e. how much current is being drawn down the various lines) .
Most recently, a new "80 Plus Ruby" energy efficiency rating was introduced that surpasses the current highest tier, Titanium. Initially, Ruby-rated PSUs will be used in data centers, though it's unclear when they will be available for consumer PCs. These Ruby-rated PSUs could just as well be labeled 90 Plus, as they are required to maintain at least 90% energy efficiency across the entire power delivery system, even under a light 5% load at 230V, 277V, and 480V AC-DC, as well as 380V DC.
If we take our Cooler Master unit, running so that it's providing 325 W of power (50% of its max rating), then we can expect it to have an efficiency of 80 to 85%, depending on the mains supply voltage. This would result in the unit drawing 382 to 406 W from the wall outlet. A higher 80 PLUS rating doesn't mean the PSU gives you more power, it just wastes less during all the filtering, rectifying, switching, and transforming stages.
Also note that the peak efficiency is somewhere between 50 and 100% loading; some manufacturers provide charts showing how you can expect the unit to perform under different loads and supply voltages.
It's worth paying attention to this information sometimes, especially if you've tempted to lay down a stack of bucks on a 1000 W PSU. If your computer is going to use anywhere near that power level, then its efficiency is going to take a bit of a sting.
You might see some PSUs claiming to be single rail or multi-rail (or offer a switch to flip between the two). The term rail is just another word for the specific voltage that the power unit generates. Our Cooler Master example has a single 12 volt rail and all the various power connectors that provide +12V draw current off that rail, if used. A multi-rail PSU will have two or more systems providing the 12 volts - however, there's a big difference in how this is implemented.
PSUs for data center applications or compute servers will have multiple rails for fault tolerance, so if one fails, it won't affect the others. In multi-rail PSUs, each rail has its own overcurrent protection (OCP). This improves safety by preventing a single short circuit from drawing excessive current, which can reduce the risk of damage or fire. In our sample, the PSU provides up to 52 amps of current off the +12V line, equating to 624 watts of electrical power. A cheap multi-rail version of the same unit might have two +12V lines shown in the specification, but each will only provide 26 amps of current (or 312 W).
For most desktop users, a well-designed PSU with a single +12V rail is perfectly safe and reliable. Multi-rail designs primarily add extra safety layers for specialized systems, such as servers or high-end workstations.
Why PSU quality matters
Power supply units come in a wide range of prices. A quick run through popular listings on Amazon shows that a basic but serviceable 500 W Thermaltake unit goes for around $50, while higher end models go all the way up to $400 for a fully modular 1300 W powerhouse from be quiet, or even more for a massive 1600W PSU from Seasonic.
But what are you getting for your money? The ability to deliver more power is the obvious one, but it's how that power gets delivered.
The ultra cheap model permits up to 25A of current on the +12V lines, whereas the wallet buster provides over 3 times more, at 83A. Today's CPUs and graphics cards use the +12V lines for almost all of their power requirements, but surely 25A is enough?
Given that you can now buy a desktop CPU with 64 cores and pair it with an equally titanic graphics card, each capable of drawing 450 W or more at full load, a cheap PSU absolutely would not be up to the demand. In contrast, a more expensive unit will have the headroom to handle these power-hungry components. And with a premium CPU and GPU easily exceeding $3,000 combined, spending a few hundred more on a quality PSU is a wise investment rather than a shock.
But what you're really paying for is the quality of the components used inside the PSU. Go back to the start of this article and look at the guts of the Cooler Master unit we've been taking apart. There's not a massive amount of parts there, and since virtually every bit is critical to the operation of the device, it's not hard to see why spending more is not always money for nothing.
And with that, we bring our dissection of the PSU to a close (and leave a trail of bits all over the floor). It's a fascinating piece of a kit and the level of engineering involved in designing and manufacturing a good one is surprisingly complex.
If you've got any questions about power supply units or the one currently sitting in your computer, quietly doing its job, fire them our way in the comments section below as usual. Stay tuned for more anatomy series features.